
Version 5.9
In this Topic: Show
The Inventory screen is used to record and view data about each product. It is accessed by clicking the [View] link in the Inventory section of the Main Menu. See Manually Creating Product Inventory Records for instructions to create an inventory record.
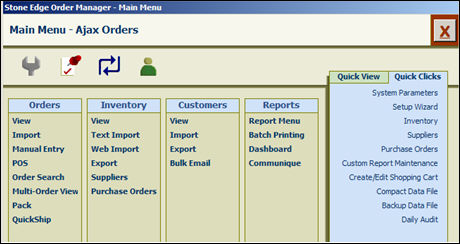
Figure 1: Main Menu: Inventory section - View link
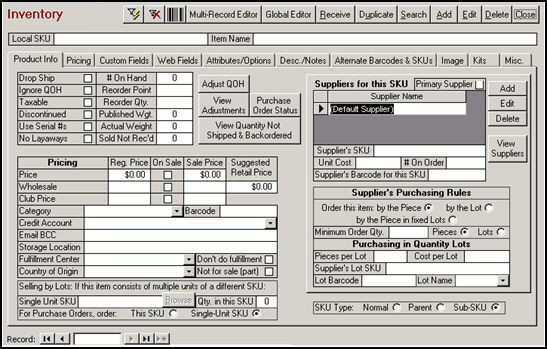
Figure 2: The Inventory Screen - Product Info tab
Along the top of the screen, there are "action" buttons that perform a variety of functions, each of which will be described in the next section.
Below those buttons, there are two text fields, Local SKU and Item Name that are used to identify the product.
Lastly, there is also a series of tabs underneath the text fields, each of which contains additional information about the product. The tabs are briefly discussed in this article and links to other Knowledge Base pages may be provided to direct the user to more detailed information about a particular tab.
![]() - The Select Items screen is opened when this button is clicked, allowing the user to limit the Inventory records that will be displayed, based on the SKU, or partial SKU number.
- The Select Items screen is opened when this button is clicked, allowing the user to limit the Inventory records that will be displayed, based on the SKU, or partial SKU number.
![]() - This button will remove any filters that were previously applied to limit the number of Inventory records that are displayed (Select Items screen).
- This button will remove any filters that were previously applied to limit the number of Inventory records that are displayed (Select Items screen).
![]() - Click this button to open the Print Barcode Labels (Select from List) screen. Enter the number of labels that should be printed, and select the report format to be used.
- Click this button to open the Print Barcode Labels (Select from List) screen. Enter the number of labels that should be printed, and select the report format to be used.
![]() - The Edit Inventory screen opens when this button is clicked; it allows the user to update data in certain fields, for more than one product inventory record at a time.
- The Edit Inventory screen opens when this button is clicked; it allows the user to update data in certain fields, for more than one product inventory record at a time.
![]() - The Global Editor is a useful tool when it's necessary to make the same change to a large group of product inventory records.
- The Global Editor is a useful tool when it's necessary to make the same change to a large group of product inventory records.
![]() - Use this button to Receive product inventory that was not ordered by the Order Manager's Purchase Order system.
- Use this button to Receive product inventory that was not ordered by the Order Manager's Purchase Order system.
![]() - If entering product information for items that are very similar, use the Duplicate Selected Product screen to create a copy of an inventory record, decreasing the amount of time it takes to enter product information in a new inventory record.
- If entering product information for items that are very similar, use the Duplicate Selected Product screen to create a copy of an inventory record, decreasing the amount of time it takes to enter product information in a new inventory record.
![]() - This button will open a variation of the Find Products screen at which the user may choose criteria to select or Search for product records.
- This button will open a variation of the Find Products screen at which the user may choose criteria to select or Search for product records.
![]() - To enter a new product record, click the [Add] button; a blank inventory record is opened.
- To enter a new product record, click the [Add] button; a blank inventory record is opened.
![]() - The [Edit] button must be clicked in order to unlock the current record to make changes to it. Use the [Save] button to retain the changes and lock the record.
- The [Edit] button must be clicked in order to unlock the current record to make changes to it. Use the [Save] button to retain the changes and lock the record.
![]() - Use this button to remove a product inventory record from the system. If orders have been placed and processed for a product, Stone Edge Technologies recommends discontinuing the SKU rather than deleting it. To discontinue an item, click the [Edit] button, check the [Discontinued] check box, and click [Save].
- Use this button to remove a product inventory record from the system. If orders have been placed and processed for a product, Stone Edge Technologies recommends discontinuing the SKU rather than deleting it. To discontinue an item, click the [Edit] button, check the [Discontinued] check box, and click [Save].
![]() - Click this button to exit the Inventory screen.
- Click this button to exit the Inventory screen.
Local SKU - enter a value for the Stock Keeping Unit that identifies the product at your warehouse
Item Name - enter an arbitrary, but meaningful value as the name for the product
![]()
The Product Info tab is the default view that is seen when the Inventory form is opened, as shown in Figure 2, above. This tab contains the basic product information, such as the type of properties the product has, such as drop-ship, taxable, discontinued, etc., as well as the cost, quantity on hand count, and supplier information. For more details, review the Knowledge Base page about the Product Info Tab of the Inventory Screen.
The Pricing tab is where the merchant can establish up to ten price levels per product, such as Retail, Wholesale, Club Pricing, Employee Pricing, etc.
To enable Multi-Level pricing, set system parameter UseMultiLevelPricing to True. For directions, refer to the Knowledge Base article, Set System Parameters.
Price levels are configured using the system parameters in the Pricing parameter group. For more information about setting Price Levels, see the Knowledge Base article, Price Levels.
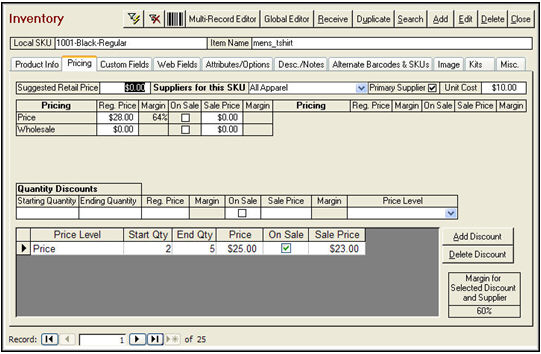
Figure 3: Inventory screen - Pricing tab
The Custom Fields tab will only be visible if Custom Fields have been defined within the program. The program allows the user to create their own inventory-related fields, with a limit of five fields per field type (text, integer, date, or currency). To learn how to define a custom inventory field, review the following Knowledge Base page, Configuring Custom Fields.
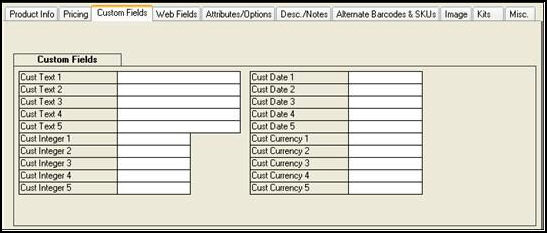
Figure 4: Inventory screen - Custom Fields tab
The Web Fields tab houses settings related to inventory synchronization between the Order Manager and shopping carts (Web sites), as well as fields that pertain to Web images of products. See the Knowledge Base page, Web Fields Tab of the Inventory Screen for more information.
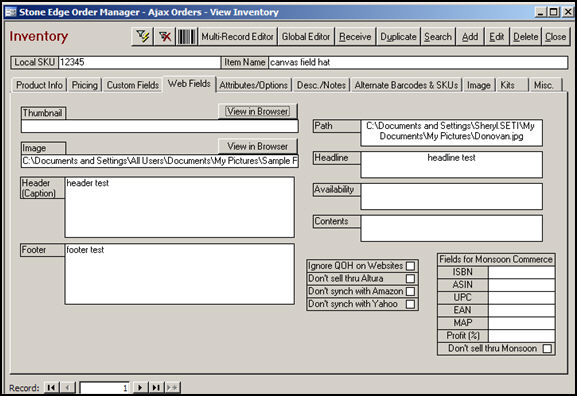
Figure 5: Inventory screen - Web Fields tab
The Attributes/Options tab of the Inventory screen is where the user defines size, color, finish, and/or model attributes for a given product.
Depending on the Shopping Cart system that is being used, the Order Manager can then track the product inventory at the attribute, or option level (size, color, finish, etc.).
Refer to the Knowledge Base page, Attributes/Options Tab of the Inventory Screen.
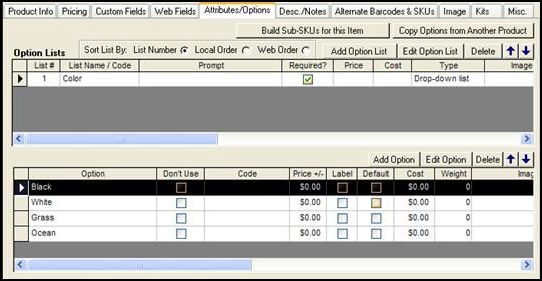
Figure 6: Inventory screen - Attributes/Options tab
The Desc./Notes tab not only contains the "long" product description field, it also contains the Customs Description field used by Endicia's DAZzle shipping software when sending packages internationally for USPS..
The lower half of the screen is where the user can add, view, edit, print or search for Tasks that are related to the currently selected product.
For more information about Notes and Tasks, click the hyper-links and read the related Knowledge Base pages.
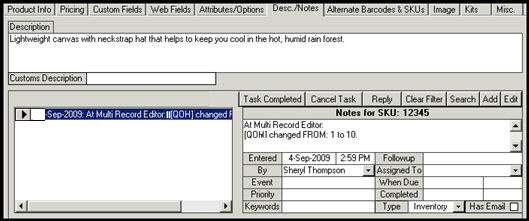
Figure 7: Inventory screen - Desc./Notes tab
The Alternate Barcodes & SKUs tab is where the user can assign an "alias" SKU or Barcode to a given product, in addition to its regular SKU and/or Barcode.
Assigning an Alternate SKU can be helpful in several situations. To learn more, review the Knowledge Base page, Alternate Barcodes & SKUs.
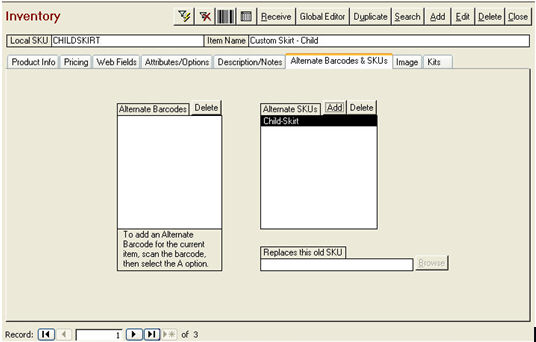
Figure 8: Inventory screen - Alternate Barcodes & SKUs tab
The Image tab is where the user can record the path to an image of the currently viewed product.
It is possible to [Browse] to the location of the image file and select it rather than typing in the fully qualified path.
If system parameter PackingShowImages is set to TRUE, the program is able to display the product image as it is being packed at the Pack and Ship screen.
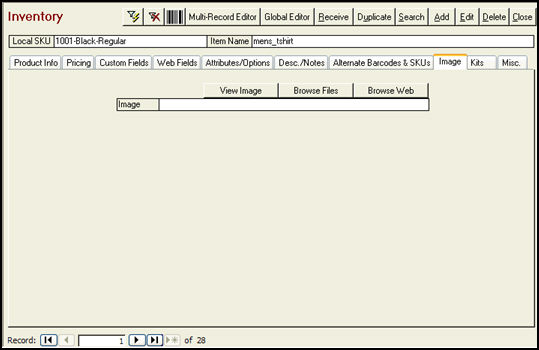
Figure 9: Inventory screen - Image tab
Click on the Kits tab of a an inventory record whose SKU is defined as a Kit parent, to view, add or make changes to the items that make up the Kit.
For additional information, such as defining a product as the parent SKU of a Kit, refer to the Knowledge Base article, Define Kits Screen.
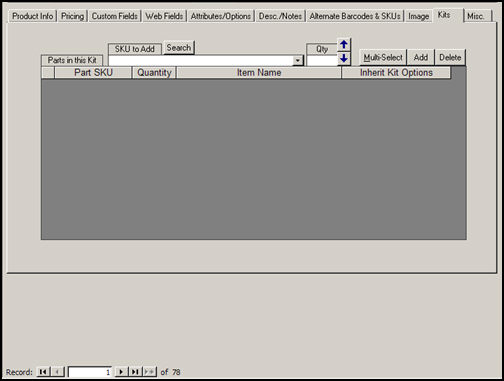
Figure 10: Inventory screen - Kits tab
The Misc. tab is used to:
Indicate which products are actually boxes for shipping products.
Select a default box to use for a specific product.
Enter the dimensions of a product.
Select messages to be displayed when certain products are added to a Manual or POS order.
Designate cross-sell products that the program should display when the current product is added to a Manual or POS order.
For more information, refer to the Knowledge Base article, Misc. tab of the Inventory screen.
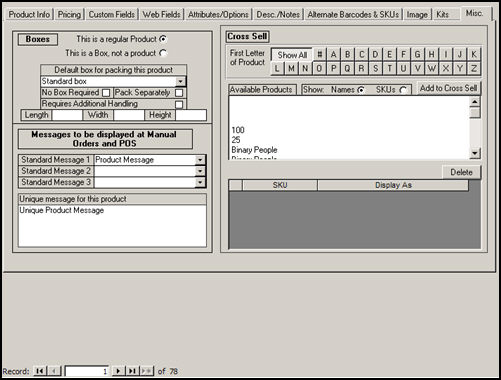
Figure 11: Inventory screen - Miscellaneous tab
These instructions assume that supplier records have already been entered into the Order Manager. If not, either enter them manually via the Suppliers screen or use the Import Data from Other Sources screen to import the data from a database or text file.
Product records can also be imported directly from some shopping carts (check the Shopping Cart Matrix)
From the Main Menu, click the Maintenance Menu icon and select the Inventory & Suppliers tab.
Double-click the Inventory entry in the list of activities to open the Inventory screen.
Click the [Add] button.
Enter a unique value in the Local SKU field to identify the item.
Enter a value in the Unit Cost field.
Select a Supplier from the Suppliers for this SKU list.
At this point the record for this inventory item can now be saved, or the user can continue to complete the other fields on this screen as well.
When finished, click the [Save] button at the top of the form to create the inventory record.
Created: 11/18/10
Updated: 6/6/11
Modified: 1/12/12
Go to Top