
Version 5.9
In this Topic: Show
The Global Editor screen is used to make the same change to a large group of products at the same time. It is accessed via the Inventory & Suppliers tab of the Maintenance Menu, or by the Global Editor button on the Multi-Record Editor or Inventory screens.
Some examples of the ways in which the Global Editor can be used are to:
change the category of all products with SKUs that begin with "ABC".
change the reorder point of all products with the word "silver" in their name that are also assigned to inventory category "XYZ", to "12".
change the location of all products in location "A" that have a specific value in a custom text field to location "B".
It is critical that the data file is backed up prior to performing this function as any actions taken here cannot be reversed by the program.
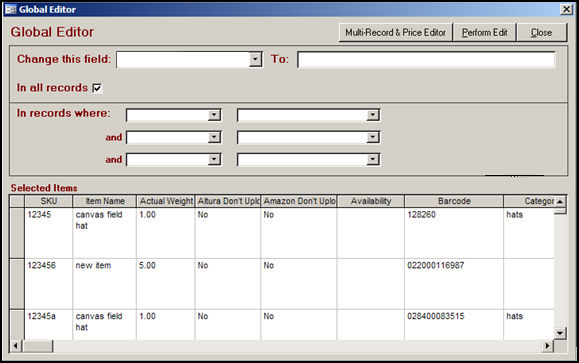
Figure 1: Global Editor screen
choose an Order Manager field from this list
when a selection has been made from the possible Order Manager fields in this drop-down list, the To: section of the screen will become visible; however, it will take a different form depending on the field that is selected
this area will not be visible until a field has been selected from the Change this field: drop-down list; the form of this section will vary based on the field that is chosen in the Change this field: drop-down list
click in this box to make a simple change to all inventory records based on the information specified in the Change this field: and To: sections of the screen
use this series of drop-down lists when making a change that requires additional filtering to refine the target group of records that will be affected
all inventory records will be initially listed in the Selected Items section of the screen, however, as criteria is specified in the fields at the top of the screen, the list of inventory records will change to only include those that match the specified criteria, or the "target" group of records
click this button to open the Multi-Record & Price Editor screen
when all data has been entered, click this button to execute the changes
click this button to exit the Global Editor screen
Open the Global Editor screen by going to the Inventory & Suppliers tab of the Maintenance Menu or by using the Global Editor buttons on the Multi-Record & Price Editor screen or the Inventory screens.
Choose the field whose contents are to be changed from the Change this field: drop-down list.
The To: field will become visible. Make the appropriate selection for the change type.
To update all inventory records with this change, make sure the In all records check box is checked. Skip to step 7.
If only a limited number of records are to be updated, un-check the box and continue on to the next step.
Choose additional filtering criteria in the In records where: section of the screen to limit the records that will be affected by the change.
The first column of drop-down lists contain all of the available choices of Order Manager fields to use as selection criteria.
The second column contains drop-down lists of "operators" that will be applied when filtering the record set based on the criteria that was entered in the drop-down list in the first column. Some of the operators are: equals, does not equal, includes, does not include, is empty, greater than, less than, or begins with, etc. The operators that are available will change depending on the type of field that is selected in the first column drop-down list.
In some cases, additional selection fields may appear in a third column, depending on the Order Manager field and conditional operator that is chosen in the first and second columns.
When the target group of records has been properly established, click the [Perform Edit] button to make the changes in each of the records in the target group.
The program will prompt for verification prior to making the change.
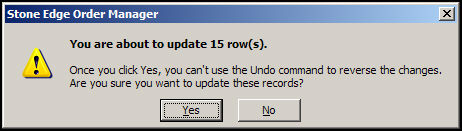
Figure 2: Prompt for confirmation before making changes
Click [OK] to execute the change.
The program will indicate the success or failure of the process. Click [OK] to conclude the process.
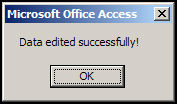
Figure 3: Results dialog
To change the inventory records of all products that begin with the text string "binary' in their LocalSKU field to a discontinued status, the screen would look like this:
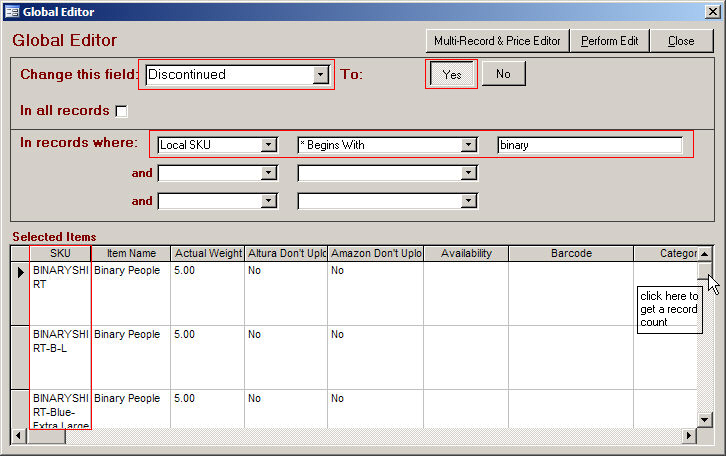
Figure 4: Global Editor screen - showing a target group of inventory records before the change is made
As we can see, the SKU column now shows only records that start with BINARY*, and if we scrolled over to the right, the Discontinued field currently shows No for each of these records. Refer to Figure 5.
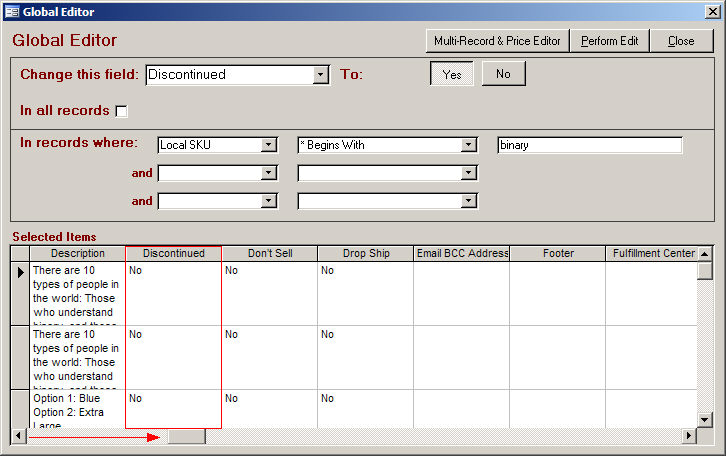
Figure 5: Global Editor screen - scrolled to the right to see the Discontinued field before the change is made
After the Perform Edit button is clicked, and the subsequent prompt is OK'd, the value in Discontinued column of each record will be changed to Yes.
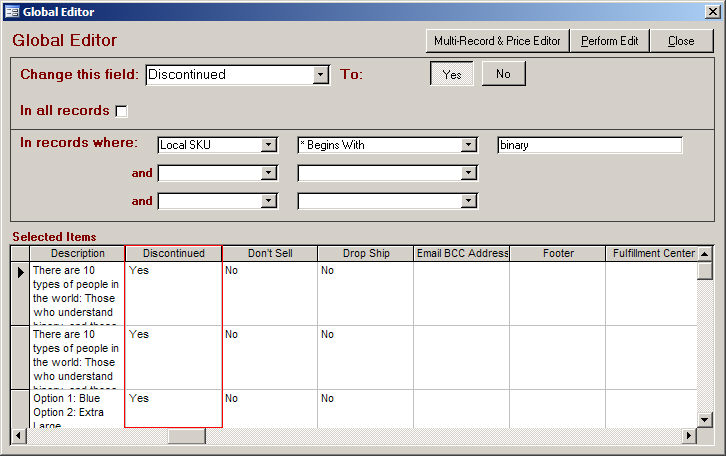
Figure 6: Global Editor screen - after the changes were executed
Example 1 showed a simple example, where only one selection criteria was specified, however, it is possible to specify up to three sets of criteria to zero in on a list of target records.
Building on Example 1, let's say we only want to change the status of products whose LocalSKU field starts with "binary" and also belong to the category "Clothing", to be "discontinued".
Notice in the image below that now only one inventory record matches those criteria.
If it is necessary, add yet another set of criteria by selecting values from the third row of drop-down boxes in the In records where: section of the screen, to further limit the target group of inventory records
When satisfied with the results of the filtering, click the [Perform Edit] button to make the changes.
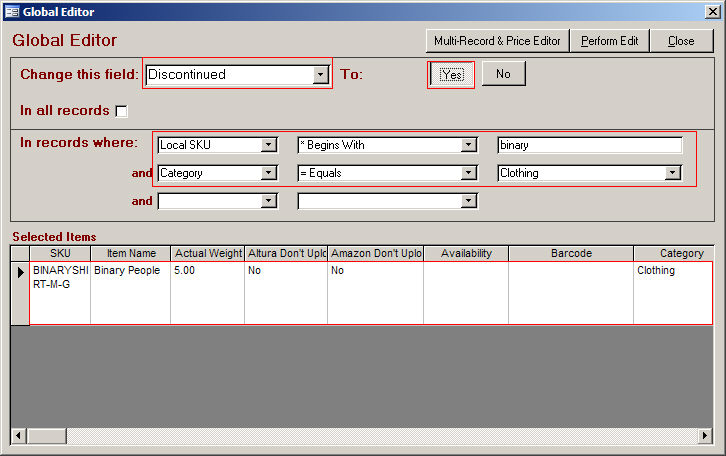
Figure 7: Global Editor screen - multiple selection criteria specified
To change the value in the same field of every inventory record to the same new value, simply check the In all records: check box and choose the field from the Change this field: drop-down list. Select the appropriate value in the To: field.
Click the Perform Edit button to execute the changes.
For instance, to change all inventory records to a discontinued status, the screen would look like this:
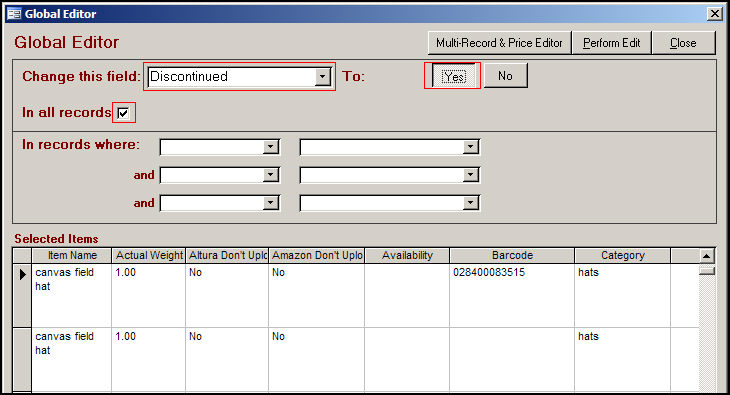
Figure 8: Global Editor screen - change the value of a selected field to the same value in all inventory records
Created: 4/11/11
Go to Top