
Version 5.9
In this Topic: Show
The Enter Barcodes screen can be accessed via the Inventory & Suppliers tab of the Maintenance Menu, and allows the user to quickly enter barcodes for a group of inventory items, as opposed to editing each individual inventory record.
An alternate method of assigning barcodes to products without a barcode scanner is to have the program autogenerate barcodes as inventory records are created. To use this feature, set system parameter AutoGenerateBarcodes to TRUE. This will have no effect on inventory records that have been created prior to this parameter being set to TRUE. Refer to Barcodes and Barcode Scanners for more information.
Barcodes must be unique across all products. If the user attempts to enter the same barcode for more than one inventory record, the program will tell the user that it cannot perform the requested action and indicate the product record to which that barcode is already assigned.
The grid at the bottom of the screen contains all of the inventory items that have been defined in the program. Use the controls at the top of the screen to locate a group records to be updated, select the row of a product and scan the barcode of the product.
The user must complete several steps to configure the barcode scanner prior to attempting to enter barcodes for products. Refer to Configuring a Metrologic Barcode Scanner for more information.
The Order Manager has only been rigorously tested with the Metrologic Voyager MS 9520 barcode scanners. Other scanners that emulate keyboard input may work with the Order Manager, but they have not been certified by Stone Edge Technologies, Inc.
![]() Click the Show
link next to "In This Topic"
at the top of this page to see a series of links in outline form,
which can be used to quickly jump to that section of the topic.
Click the Show
link next to "In This Topic"
at the top of this page to see a series of links in outline form,
which can be used to quickly jump to that section of the topic.
In addition, major topics may provide a brief synopsis of a field's purpose or direct the reader to the appropriate section of the topic by scrolling over the image. To return to the previous location within the same page, right-click the mouse and select [Back].
If clicking a field directs the reader to a different Knowledge Base topic, it will open in a new tab or window, leaving the currently viewed topic open. The browser's settings determine whether a new tab or window is opened.
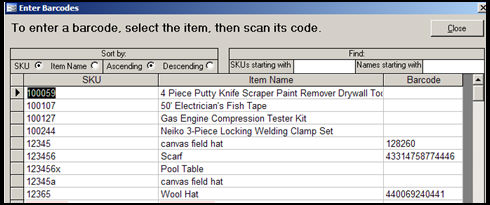
Figure 1: Enter Barcodes screen
use the radio buttons in this section to sort the inventory records in a sequence that facilitates entering barcodes for a selected group of products
these controls can be used in conjunction with the fields in the Find: section
click this button sort the list of inventory records by SKU
can be used in conjunction with the SKUs starting with field in the Find: section of the screen
click this button to sort the list of inventory records by Item Name
can be used in conjunction with the Names starting with field in the Find: section of the screen
enter a string of data in these fields to jump to the location of the matching records in the list in the datasheet grid to enter barcodes for a selected group of products
these controls can be used in conjunction with the fields in the Sort by: section
this section of the screen displays a list of all of the inventory records that currently exist in the program
use the controls in the Sort by: and/or Find: sections to quickly locate the records to be changed
the current value of the SKU field in each inventory record is displayed in this column
the data in this column cannot be edited
the current value of the Item Name field in each inventory record is displayed in this column
the data in this column cannot be edited
Changes made at this screen take effect immediately. When making mass changes it is advisable to first backup the store data file.
If a barcode scanner has not yet been configured for use with the Order Manager, complete those steps before continuing with these instructions.
Use the Sort by: radio buttons or Find: fields to view the inventory records in the desired sequence.
Click anywhere in the row of a product seen in the Datasheet (Grid).
Scan the barcode of the product to see it populated in the Barcode column of the Enter Barcodes screen.
If the incorrect barcode is inadvertently scanned, simply scan the correct barcode, while the same product record is still selected. The program will prompt the user for confirmation before replacing the existing data in the grid.
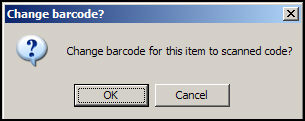
Figure 2: Change Barcode prompt
Click [OK] to continue making the change, or [Cancel] to abandon the change.
When finished adding barcodes, click the [Close] button to exit the Enter Barcodes screen.
Created: 8/2/11
Modified: 9/12/13
Go to Top