Monsoon Order Manager 8.0 > Program Tour > Main Menu & Accordion > Settings & Accordion > Order Functions > Order State Rules
Order States
Contents of this Topic: ShowHide
Overview
- The Order States feature allows you to assign certain "states" to an order, such as Layaway or On Hold. You can then specify what functions, or "Operations," can be performed on orders in each state. For example, you can prevent On Hold orders from being approved or prevent Layaway orders from being shipped.
- Monsoon
Order Manager has four preset order states that cannot be deleted: Layaway, On Hold, Quote, and Sale. You can add and define your own custom order states as well.
- Each of the preset Order States has a default setting for each Operation in the Functional Area list. If you do not specify whether a particular operation is available, the program uses the default setting. Note: The Sale state is the same as having no order state set; it does not have any restrictions on what can be done, and the only thing you can do with it at this screen is change the display colors.
- Order States can be set manually or by creating an Approval Rule.
- Order states can be highlighted with different colors to help draw the user's attention to critical states.
- There is an Order States report that prints a list of orders in a given order state, or all orders where the order state is set to anything but Sales (which is the same as no state set).
- The state of each order can be seen and edited at the Process Orders screen by users with the appropriate permissions. Order States are also visible at the Multi-Order Processor screen.
- The On Hold order state has been added to the Quick Filter drop-down list (Orders On Hold) on the Process Orders screen. You can also search by specific order states on the Additional Search Fields tab of the Search for Orders screen.
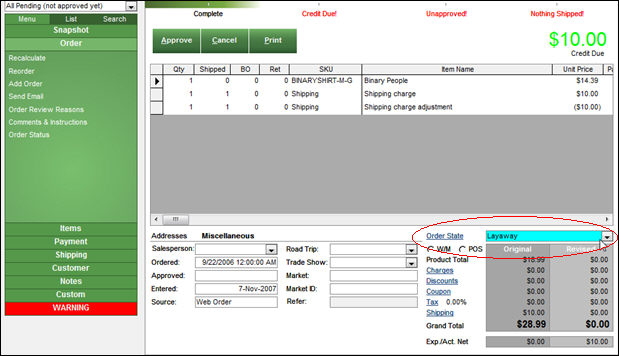
Note: Do not confuse "order state" with "order status". The order state is used in-house to track the progress of an order and to control what functions can be performed at each step along the way. The order status is similar, but is used to inform your customers of what is happening with their orders.
Order State Rules Screen

Order
State Rules screen
Select, add and delete Order States. Set display options Section
- select an existing order state to change or Delete
- select Add to create a new order state
Sample Display Section
- make selections in the Background and Font color palettes to set the way the selected order state is displayed at Process Orders
- select Save Colors when you are satisfied with your selections
Set which functions will be available for orders in the selected Order State.
- choose a functional area: View Orders, POS or Misc (the POS system is not yet supported in V8)
- select an operation from the list and determine if that operation should be allowed
- select Apply to All to allow (Yes) or disallow (No) all operations in the list
Save Button
- retains all changes or additions to operational permissions for each functional area
Adding a New Order State
-
Open the Order State Rules screen by going to Main Menu > Settings > Order Functions > Order State Rules.
-
To create a new order state, select the Add button.
-
Enter a name for the state.
-
Select OK. The new order state name appears in the Order State list and in the Order State field in the Sample Display section.
-
To set up rules for this order state, go on to the next section, Setting Order State Rules.
Setting Order State Rules
- The Order State Rules tell the program what functions (called "Operations") are enabled or disabled when working with orders assigned to a given order state.
- The Operations are divided into three Functional Areas: View Orders, POS (Point of Sale) and Misc. (the POS system is not yet supported in V8)
- Most of the Operations listed are controlled by system parameters. For example, there is a system parameter called AllowAddLineItem. It must be set to TRUE for the program to allow a line item to be added to an order.
- Many of the Operations can also be restricted by Monsoon
Order Manager ’s Security System.
Here’s how they all work together:
- First the security system is checked. If the Operation is not allowed, no further checking is done.
- If it is allowed under the security system, the system parameters are checked next. Again, if an Operation is not allowed, no other checking is done.
- And finally, if it is still allowed, the Order State rules are checked. In most cases, if an operation is not allowed because of an order state rule, the program tells you the state of the order and the operation that was disallowed.
Set rules for an Order State:
-
Select an Order State from the list. (The selected Order State also appears in the Sample Display box.)
-
Choose a Functional Area to display the list of Operations in that area.
-
Each Operation has a default setting shown in the Default column: Yes if it's allowed or No if it's not allowed. (This column will not change, providing a reference when you want to revert back to default settings.)
-
Select each Operation that you want to change from its default setting. The Allowed radio button automatically switches from the default setting to the optional setting.
-
Select Save after each selection. Your change appears in the Allowed To column.
-
Repeat these steps for each Functional Area you want to change.
-
Alternately, to change all the Operations to the same setting at once, select an Operation, select the desired Allowed status (Yes or No) and select Apply to All.
-
Select Save.
Setting Display Colors
-
Select an Order State from the list.
-
Select the background and font colors that you wish to use. Make as many changes as you like to test the colors.
-
When you have them set the way you want them, select Save Colors.
Viewing Order States at Process Orders
- Display colors are used to draw attention to the order state at the Process Orders screen, where the Order State is displayed on the Miscellaneous tab of the Orders tab.
- Select the Order State link to change the order state of the order manually.

Additional Information
Created: 7/13/12
Revised:
Published: 08/19/15