
Version 5.9
![]() Road Trips and Trade Shows is an Enterprise Edition Feature.
Road Trips and Trade Shows is an Enterprise Edition Feature.
This article covers the topics listed below. If this is your first time using the Road Trips feature, read the sections in the order presented. Otherwise, click a link to jump to that section:
The Road Trip feature allows you to take orders and enter them into the Order Manager when you are away from your home office. You may take orders at trade shows or sell goods at conventions. Or you may have outside sales people who would like to enter orders while they are on the road visiting customers. With Road Trips and Trade Shows you can enter orders and track inventory on the road, then import those orders back into your main Order Manager database, along with new customers, credit card transactions, quotes, etc.
Following is an overview of how it works. The first steps take place at your home office:
Add a Road Trip. There are two kinds of road trips: trade shows and outside sales. Road trips also have a name, a start and end date, and a salesperson. The salesperson is required for outside sales and optional for trade shows. One Road Trip can include any number of trade shows. For example, you might pull a truckload of inventory and take it to several conventions in one trip, then check in the remaining inventory and import the results when you return to your home office.
Create Trade Shows. Next, create your Trade Show(s). (Note: Outside Sales Road Trips do not have trade shows associated with them.) Each Trade Show has a name, price level, start and end dates, the state where the show will be held, and the sales tax rate for sales at that show.
Assign Trade Shows to Road Trips. Next, tell the program which Trade Shows will be part of each road trip. (Again, Outside Sales Road Trips do not have Trade Shows associated with them.)
Create the Road Trip Data File. Create the Order Manager data file to be used on the Road Trip. You can select which customers and products to include in the data file, or include all of them. The Order Manager will know when you are working with a Road Trip data file and will not let you perform certain functions, such as importing orders from a shopping cart, which should only be performed at your main office.
Pick and Export Inventory to Road Trip Data File. If you want to take inventory with you to sell on your trip, select the inventory products and quantities, and export a text file with the list (the Inventory Transfer File). The program will deduct from the inventory quantity on hand in your main store file and print a pick list that you can use to pull the items for the trip. This step can be repeated as needed to replenish your Road Trip inventory by having another Inventory Transfer File sent from the home office, along with the products.
These steps take place on the Road Trip:
Select the Current Trade Show. This lets you keep track of which sales were made at each show.
Import the Inventory Transfer File. This imports the inventory quantities you selected from your main data file into the Road Trip data file.
Check In the Inventory. Receive the inventory into the Road Trip data file.
Repeat steps 6, 7 and 8 as needed for additional trade shows and to receive additional inventory.
Enter Your Road Trip Orders. You can use the Manual Orders screen or the POS (Point of Sale) system.
When you return to your office after you return from the trip:
Import Your Road Trip Results. And check in any returned inventory.
View Your Road Trip Data. View the Road Trip Data in your main Order Manager data file.
Each of the Overview steps above are detailed in the sections below.
To open the Road Trips screen, go to Maintenance Menu> Import & Export> Road Trips.
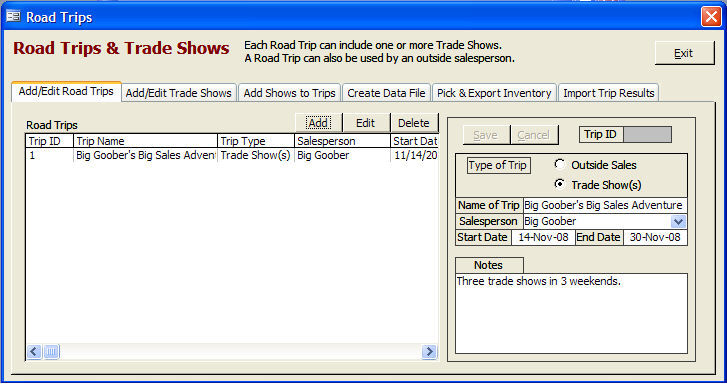
To Add a road trip:
Go to the Add/Edit Road Trips tab.
Click the Add button.
On the right-hand side of the screen, select the Type of Trip, and then fill in the Name of Trip, Salesperson, Start Date and End Date.
Click the Save button.
To Edit a road trip:
Go to the Add/Edit Road Trips tab.
Select the trip you want to edit.
Click the Edit button.
On the right-hand side of the screen, make any changes you need.
Click the Save button.
To Delete a road trip:
Go to the Add/Edit Road Trips tab.
Select the trip you want to delete.
Click the Delete button. Note: you cannot delete a road trip for which you have exported inventory information.
To open the Road Trips screen, go to Maintenance Menu> Import & Export> Road Trips.
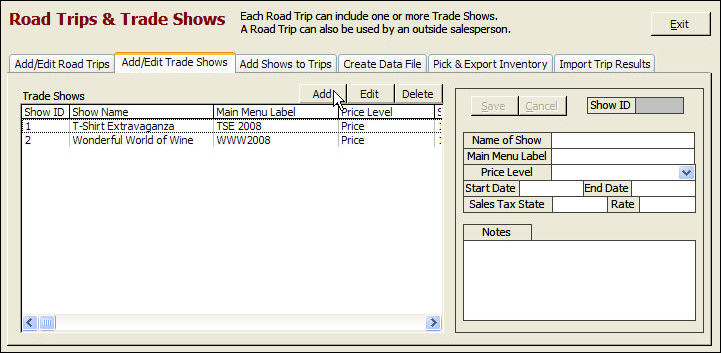
To Add a Trade Show:
Go to the Add/Edit Trade Shows tab.
Click the Add button.
On the right-hand side of the screen, fill in the information about the show. The Main Menu Label is what the Order Manager will display on the Main Menu when using the Road Trip’s data file.
Click the Save button.
To Edit a Trade Show:
Go to the Add/Edit Trade Shows tab.
Select the show you want to edit.
Click the Edit button.
On the right-hand side of the screen, make any changes you need.
Click the Save button.
To Delete a Trade Show:
Go to the Add/Edit Trade Shows tab.
Select the show you want to delete.
Click the Delete button.
Note: This step only applies to Trade Show-type Road Trips.
To open the Road Trips screen, go to Maintenance Menu> Import & Export> Road Trips.
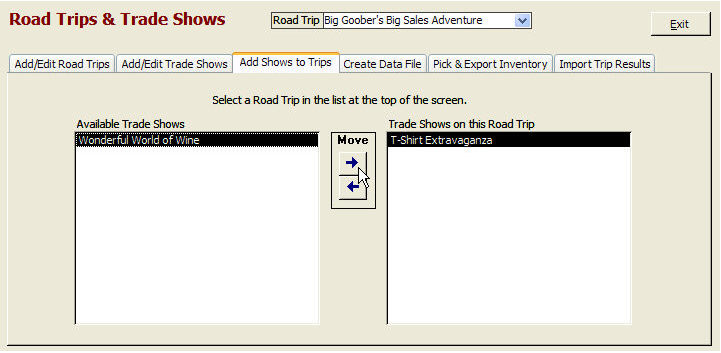
To assign Trade Shows to Road Trips:
Select the Road Trip in the drop-down list at the top of the screen.
Select one of the Available Trade Shows on the left-hand side of the screen.
Click the top arrow button to add the selected Trade Show to the current Road Trip.
To remove a Trade Show from a Road Trip, select the Trade Show on the right-hand side, and then click the bottom arrow button.
Note: A Trade Show can only be assigned to one Road Trip.
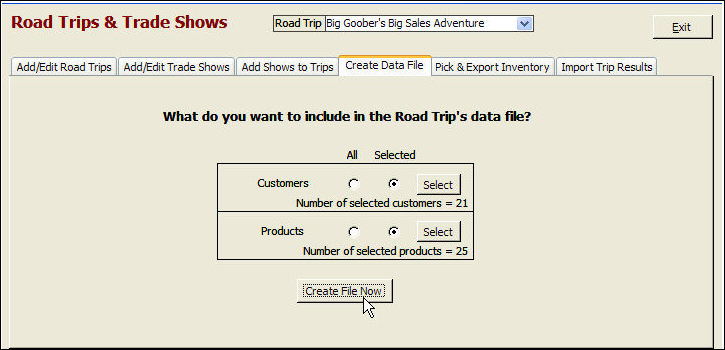
To create the Order Manager data file for a Road Trip:
Go to Maintenance Menu> Import & Export> Road Trips. Click the Create Data File tab.
Select the Road Trip from the drop-down list at the top of the screen.
To include only Selected Customers in the data file, click the Selected option for Customers, then click the Select button. The Search for Customers screen opens. Enter your selection criteria.
To include only Selected Products in the data file, click the Selected option for Products, then click the Select button. The Select Items screen opens. Enter your selection criteria.
The Create Data File screen will indicate the number of customers and products that have been selected (unless you choose All customers or products).
To include All Customers in the data file, click the All option for Customers, then click the Select button.
To include All Products in the data file, click the All option for Products, then click the Select button.
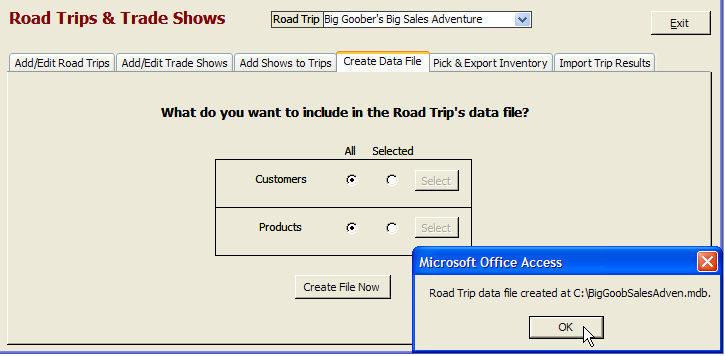
Click the Create File Now button. The program will ask for a file name and location. Make a note of the location; you will have to find that file and copy it to a computer that will be taken on the road trip.
This step is only necessary if you want to take products to sell on your trip. If you do not take products, any orders that you enter will be treated as backorders. You can fill them after you import them into your main Order Manager data file when you return to your home office.
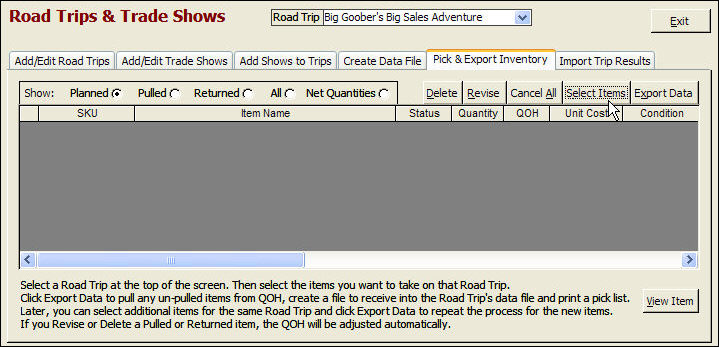
To select the items to take on your trip:
Go to the Pick & Export Inventory tab.
Select the Road Trip in the drop-down list at the top of the screen.
Click the Select Items button. The Multi-Select screen will appear:
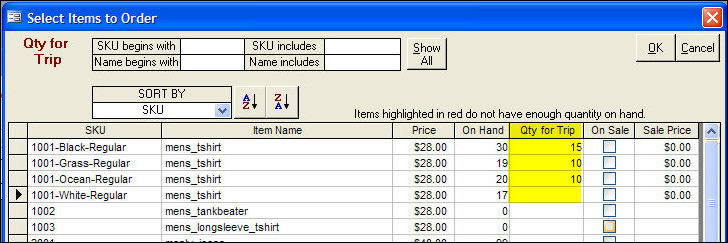
Scroll through your inventory or use the filters to display different items. Fill in the Qty for Trip column with the quantity of each item that you want to take with you. The quantity you enter cannot exceed the On Hand quantity.
Click OK to return to the Road Trips screen.
At this point, the items you have selected are just "planned", and have not yet been deducted from your inventory. You can leave this screen and return later to continue planning the trip without losing any of your work. Items can be planned and pulled multiple times for the same trip.
Note the Show options that let you select which items to view:
Planned: Items that you plan to take, but that have not been pulled from inventory yet.
Pulled: Items that have been pulled from inventory and exported into an XML formatted text file for transfer to the road trip’s data file.
Returned: Items that have been returned to inventory following the end of the road trip.
All: All of the planned, pulled, and returned items for the current road trip.
Net Quantities: For items that have been pulled, this shows the quantity pulled, returned, and net quantity out (assumed to have been sold or otherwise disposed of).
Use the Delete and Revise buttons to make any changes that are necessary.
Click Cancel All to start over, deleting all data for the selected road trip and returning any pulled items to inventory.
To pull the current Planned inventory quantities from inventory, click the Export Data button.
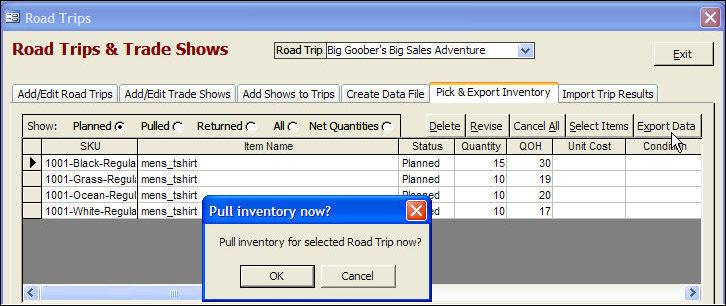
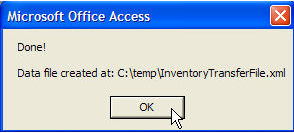
In the Pull inventory now? box, click OK Create the Inventory Transfer File (XML-formatted) that you will later import into your road trip data file. Give it a name you will remember and a location that you can access from the road.
Choose Yes or No to print a pick list to use for pulling the actual items from your warehouse.
Install the Order Manager on the computer(s) that you will take with you on your road trip. If you plan to use more than one computer at the same trade show, you should arrange to network them together so they can share the same data file.
Copy the Order Manager data file that you created for the road trip onto one of the computers that you will take on the road trip. If you will be using multiple computers, that computer will act as the file server for all of them. It can also be used as a workstation.
Note: This step is not required for Outside Sales Road Trips.
In the Order Manager, open the Road Trip data file. (Go to Main Menu> Switch Stores. Click the link to the Road Trip data file or click the Browse button and select the file.)
Open the Road Trips screen. (Go to Maintenance Menu> Import & Export> Road Trips.) Because you are using a Road Trip data file, you will see different options at this screen:

Select the current Trade Show and click the Save button. Be sure to repeat this step every time you start selling at a different trade show so the Order Manager can track the sales from each show.
Note: This step is not required for Outside Sales Road Trips. It is only required for Trade Show Road Trips when you take products to sell.

Make sure that you have access to the XML-formatted Inventory Transfer File that you generated when you pulled inventory for the Road Trip.
Go to the Receive Inventory tab.
Click the Import Inventory Transfer File button. Browse to the inventory transfer file and open it.

The program will list the items in the transfer file:
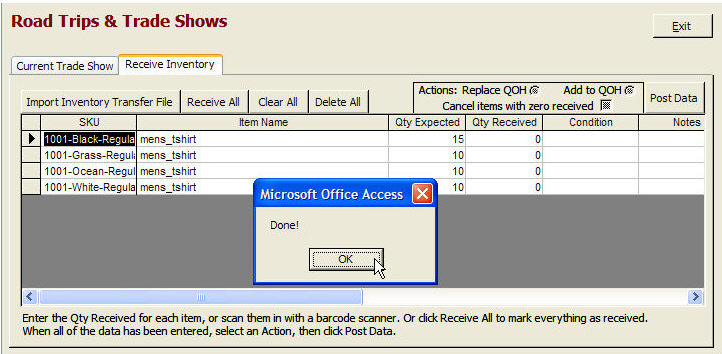
Click OK.
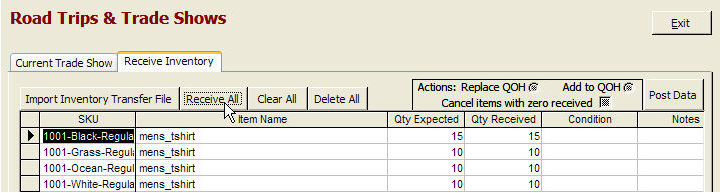
Check in the inventory. There are three ways to do that:
Click Receive All to set the quantity received for each item to the quantity expected.
Enter the received quantities by typing them into the Qty Received column.
Scan the items with a barcode scanner. The scanner must be properly configured for use with the Order Manager. (See Barcodes and Barcode Scanners for setup information.)
You can also:
Click Clear All to reset the quantity received for all items to zero.
Click Delete All.
Once you have set the quantity received for everything, set the following options:
Select Replace QOH to replace the quantity on hand for the items listed on the screen with the quantity received. Note that the QOH in road trip files always starts at zero, and is increased when you import an inventory transfer file. If you only import one transfer file, Replace QOH and Add to QOH will give you the same results.
Select Add to QOH if the inventory transfer file represents additional or replenishment inventory received during a road trip.
Cancel Items with Zero Received option: Leave this option un-checked if you expect additional deliveries for the current Inventory Transfer File, or if you have not logged everything in yet and want to continue at a later time. If you check this option, the program will assume that anything with a quantity received of zero is missing and will not be received.
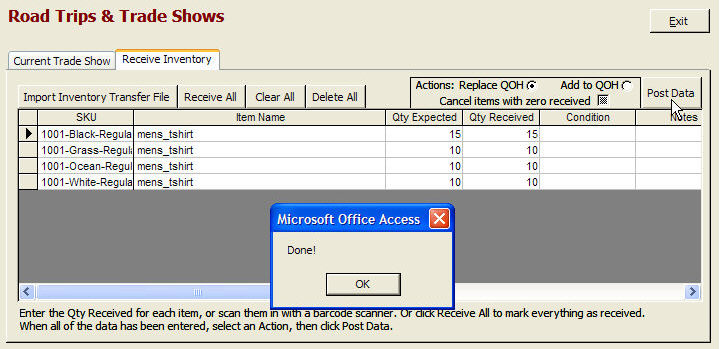
Click the Post Data button to complete the process and update the quantity on hand in the Road Trip inventory data.
Click Exit.
Use the Manual Orders screen and/or the POS (Point of Sale) screen to enter orders during your road trip. If you have taken inventory with you on your trip, the program will keep track of your inventory. The program will mark backorders as "needed" so they can be filled when you return to your home office at the end of your trip. You can also create quotes on your trip; they will be imported along with orders, customers, transactions, etc. when you return.
Once you have returned to your home office, import your Road Trip data.
In the Order Manager, open your main store data file. Make sure that you have the final copy of the Road Trip data file available. (If the Order Manager is still linked to your road trip data file, go to Main Menu> Switch Stores and choose your main store data file.)
Go to the Import Trip Results tab. The screen will start out mostly blank.
Click Open Database to Import From. Browse to the Road Trip data file and open it.

The screen will list the items pulled for the trip (if any), and some information about the orders and inventory information in that file.
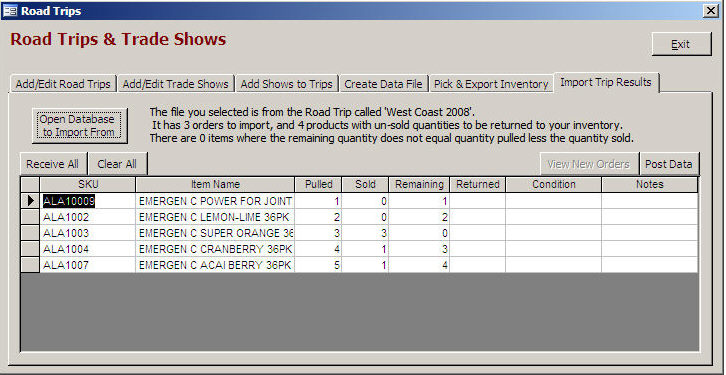
Enter the quantity of each item that was left at the end of the trip and is to be returned to your main inventory. You can use the Receive All and Clear All buttons, or enter data directly into the Returned column, or use a barcode scanner to log in the items. (Obviously, you can skip this step if you did not take any inventory on your trip.)
When you are finished, click the Post Data button. When you click Post Data the inventory data, orders, customers, quotes, etc. from the Road Trip will be imported into your main data file.
You can see the Road Trip and Trade Show where an order was taken on the Comments and Instructions tab of the View Orders screen:
You can also search for orders from specific Road Trips or Trade Shows:
When you import orders from a Road Trip, the Order Manager will assign them a new order number. The original order number from the Road Trip will be treated similarly to a Web order number. It will appear as RT-, plus the Road Trip ID Number- and the Original Order Number. For example, order number 1234 from Road Trip 34 would have a Web order number of RT-34-1234. Here is an example from the View Orders screen:

Created: 1/23/12
Revised: 3/19/12
Go to Top