
Version 5.9
The Order States feature was introduced in the Order Manager 5.8XX Beta series.
The Order States feature allows you to assign certain "states" to an order, such as Layaway or On Hold. You can then specify what functions, or "Operations," can be performed on orders in each state. For example, you can prevent On Hold orders from being approved or prevent Layaway orders from being shipped.
The Order Manager has four preset order states that cannot be deleted: Layaway, On Hold, Quote, and Sale. You can also add and define your own custom order states.
The state of each order can be viewed and edited at the View Orders screen by users with the appropriate permissions, and can also be viewed on the Multi Order Processor screen. The On Hold order state has been added to the Quick Filter drop-down list on the View Orders screen. You can also select for specific order states on the Additional Search Fields tab of the Search for Orders screen. Order states can be highlighted with different colors to help draw the user's attention to critical states.
You can set the Order State based on an Approval Rule and there is an Order States report that can print a list of orders in a selected order state, or all orders where the order state is set to anything but Sales (which is the same as no state set).
Note: Do not confuse "order state" with "order status". The order state is used in-house to track the progress of an order and to control what functions can be performed at each step along the way. The order status is similar, but is used to inform your customers of what is happening with their orders.
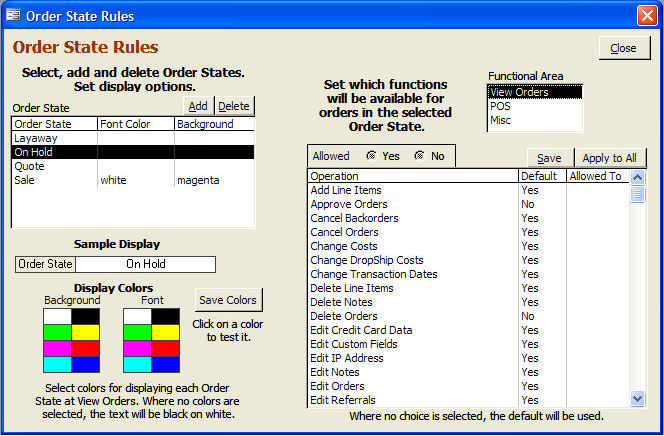
In the box on the left side of the screen, you select, add, delete and set display options for order states. Once you select or add an order state, you can set rules for it on the right side of the screen.
There are four preset order states that the program creates for you that cannot be deleted: Layaway, On Hold, Quote and Sale. These preset Order States have a default setting for each Operation in the Functional Areas lists. If you do not define each operation, i.e., specify whether a particular operation is available or not, the program will use the default setting.
Note: The Sale state is the same as having no order state set; it does not have any restrictions on what can be done, and the only thing you can do with it at this screen is change the display colors.
Open the Order State Rules screen from the Setup Functions tab of the Maintenance Menu.
To create a new order state, click the Add button.
Enter a name for the state. Click OK.
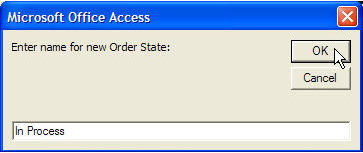
The newly created order state will appear in the list and in the Sample Display box.
After you create an Order State, then go to the right side of the screen to set up rules for some or all of the Operations in each of the three Functional Areas (View Orders, POS, Misc). To set up rules, go on to the next section below, Defining Order State Rules.
Note: Each newly created Order State will have the same Functional Areas, Operations, and default settings as the preset Order States.
The Order State rules tell the program what functions (called "Operations") are available and which operations are not available when working with orders in a particular order state. The Operations are divided into three Functional Areas: View Orders, POS (Point of Sale) and Misc.
Most of the Operations listed at this screen are also covered by system parameters. For example, there is a system parameter called AllowAddLineItem. Many of the Operations are also covered by the Order Manager’s security system. Here’s how they all work together:
First the security system is checked. If the Operation is not allowed, no further checking is done. If it is allowed under the security system, the system parameters are checked next. Again, if an Operation is not allowed, no other checking is done. And finally, if it is still allowed, the Order State rules will be checked. In most cases, if an operation is not allowed because of an order state rule, the program will tell you the state of the order and the operation that was not allowed.
To set up rules for an Order State:
Select an Order State. The selected Order State will also appear in the Sample Display box.
On the right side, choose a Functional Area to display the list of Operations under that area. Each Operation has a default setting shown in the Default column: Yes if it's allowed or No if it's not allowed. (This column will not change, providing a reference when you want to revert back to default settings.)
Select each Operation that you want to change from its default setting. The Allowed radio button will automatically change from the default to the optional setting. Click Save after each selection. Your change will appear in the Allowed To column.
To change all the Operations at once to the same setting, select an Operation, check the desired Allowed status (Yes or No) and click Apply to All.
Repeat these steps for each Functional Area where you want to change the default settings.
Display colors are used at the View Orders screen, where the Order State is displayed at the bottom of the screen, next to the Stop Lights:

To set the display colors for an Order State:
Select an Order State from the list.
Click on the background and font colors that you wish to use. Make as many changes as you like to test the colors.
When you have them set the way you want them, click the Save Colors button.
Created: 1/20/12
Go to Top