
Version 5.9
In this Topic: Show
Levels refers to the Order Manager's ability to create up to a three-tiered hierarchy or "levels" to which products can be assigned, for the purpose of organizing a merchant's product line.
The three levels are Categories, Subcategories and Groups; Categories being the broadest classification group. The use of the terms "category" and "categories" in this article are not to be confused with the Category field on the Inventory record of a product, which can be used to identify the physical location of the product in a warehouse.
The levels, categories, subcategories and groups, that are mentioned here can be used in conjunction with Froogle, Shop.com and Stone Edge Technologies' ECom Assembler (Web catalog building program, no longer for sale). Froogle and Shop.com require that classification information is provided when product data is sent to them. Froogle only allows a single classification label for each product, while Shop.com accepts multiple level classifications per product, although only one is required.
![]() Click the Show
link next to "In This Topic"
at the top of this page to see a series of links in outline form,
which can be used to quickly jump to that section of the topic.
Click the Show
link next to "In This Topic"
at the top of this page to see a series of links in outline form,
which can be used to quickly jump to that section of the topic.
In addition, major topics may provide a brief synopsis of a field's purpose or direct the reader to the appropriate section of the topic by scrolling over the image. To return to the previous location within the same page, right-click the mouse and select [Back].
If clicking a field directs the reader to a different Knowledge Base topic, it will open in a new tab or window, leaving the currently viewed topic open. The browser's settings determine whether a new tab or window is opened.
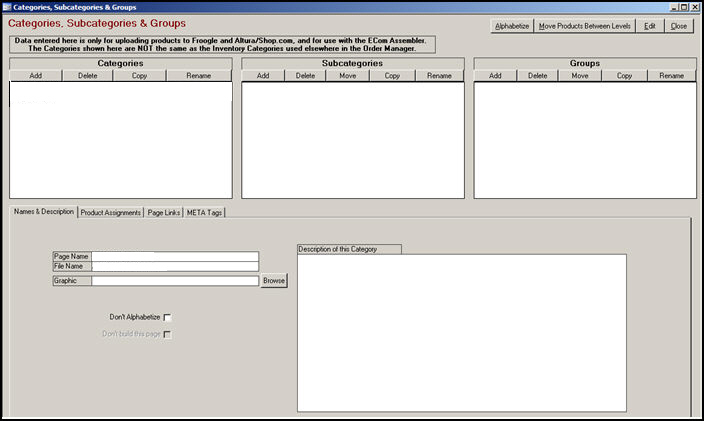
Figure 1: Categories, Subcategories & Groups screen - Names and Description tab is the default view
At the top of the screen there are three sections that will list all of the entries that have been defined in each of the three classification levels, Categories, Subcategories and Groups.
At the lower portion of the screen, there is a series of four tabs, three of which only apply to the ECom Assembler, which is outside the scope of this topic. The only tab that is relevant to this discussion is the Product Assignments tab.
It is only necessary to define the hierarchy of levels and assign products to them when using Shop.com or Froogle. No other data shown on the image above is required.
can be used to relocate a product from one product classification to another
opens the Move Products screen
permits the user to alter the contents of the Names and Description, Page Links and META Tags tabs, which pertain only to the ECom Assembler
click the [Save] button to retain the changes or the [Void] button to abandon the changes that have been made
From the Main Menu, click on the Maintenance Menu icon and click on the Inventory & Suppliers tab. Double-click on the Levels activity to open the Categories, Subcategories and Groups Screen. Refer to Figure 1.
Click the [Add] button under the Categories section of the screen and enter a name for the new category.
Click [Save].
Repeat steps two and three as often as necessary to create the broadest of classification labels that will be assigned to products.
From the Main Menu, click on the Maintenance Menu icon and click on the Inventory & Suppliers tab. Double-click on the Levels activity to open the Categories, Subcategories and Groups Screen.
Click the [Add] button under the Subcategories section of the screen and enter a name for the new subcategory.
Click [Save].
Repeat steps two and three as often as necessary to create subordinate classification labels that will be assigned to products.
From the Main Menu, click on the Maintenance Menu icon and click on the Inventory & Suppliers tab. Double-click on the Levels activity to open the Categories, Subcategories and Groups Screen.
Click the [Add] button under the Groups section of the screen and enter a name for the new group.
Click [Save].
Repeat steps two and three as often as necessary to create the most detailed or specific level of classification labels that will be assigned to products.
Select the category, subcategory or group definition to which products will be assigned, from the appropriate list at the top of the screen. Choose only one entry in one level at a time.
Click the Product Assignments tab.
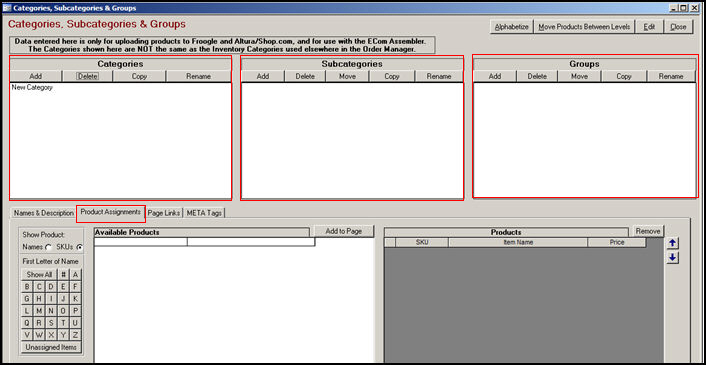
Figure 2: Categories, Subcategories & Groups screen - Product Assignment tab is displayed
the [Show All] button displays all inventory products
the number (#) or letter buttons can be used to filter the list of products that will be displayed, by those that start with a number or the specified letter
the Unassigned Items button will list all products that are not currently assigned to a level
Click the [Add to Page] button.
The selected product will now be listed in the Products section of the screen.
To remove a product from a level, select it in the Products section and click the [Remove] button.
The blue directional arrows will move the selected product up or down in the list of Products, which has no bearing in the context of this topic, as it relates only to the ECom Assembler.
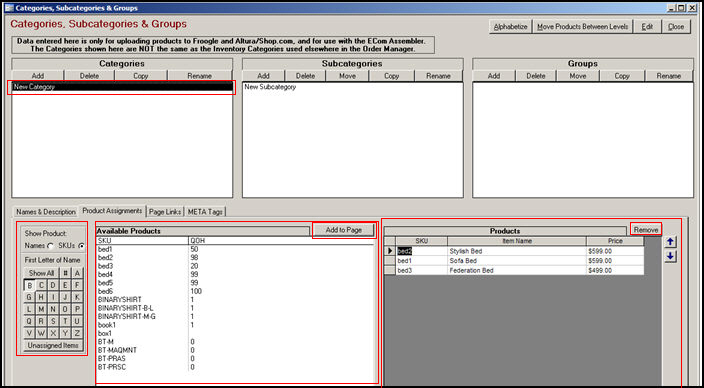
Figure 3: Categories, Subcategories & Groups screen - three products have been added the category, New Category

Figure 4: Move Products screen
Select a category, subcategory or group from the lists on the left-hand side of the screen. Then select a different category, subcategory or group in one of the lists on the right-hand side of the screen.
Use the left or right directional arrows below the Move and Copy sections of the screen to place the selected product in the appropriate level.
The other buttons at the bottom of this screen are used to change the sort order of the products in each classification level. The sort order is only applicable to the ECom Assembler, not Froogle or Shop.com. The ECom Assembler uses the sort order when it builds Web pages for each level and needs to know the order in which to list the items on each page.
Created: 2/16/11
Go to Top