
In this Topic Show
coreCommerce is a hosted eCommerce solution from Sum Effect Software. This document explains how to configure a coreCommerce shopping cart to work with the Stone Edge Order Manager.
See our shopping cart matrix to determine the shopping cart functions that are supported by this cart. Refer to the appropriate Knowledge Base pages in the Related Topics at the bottom of this page for additional resources.
Figure 1: coreCommerce Administrative Login Screen
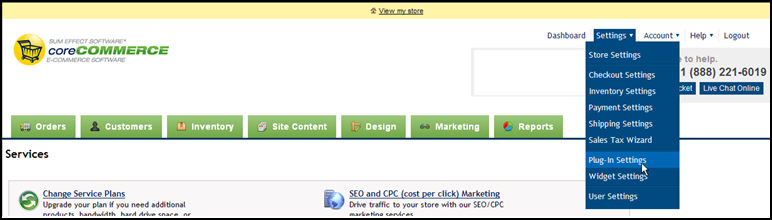
Figure 2: Main page of the Admin section of a coreCommerce shopping cart
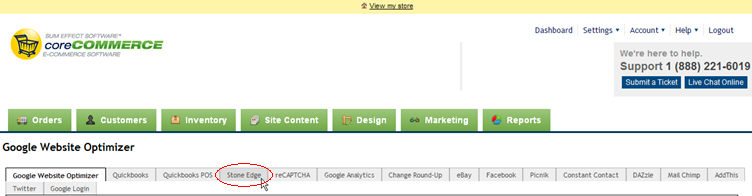
Figure 3: Plug-In Settings Page
Click on the tab labeled [Stone Edge], as shown in Figure 3 to open the Stone Edge Settings page, Figure 4 .
Enter the Username and Password that was used to login to this section of the web site.
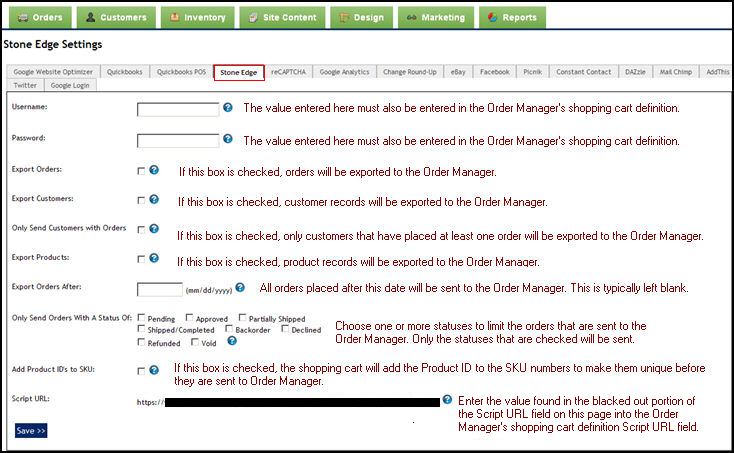
Figure 4: Stone Edge Settings tab
Check the other boxes as necessary to suit the business's needs.
Click the [SAVE] button to retain these settings.
Create the shopping cart definition in the Order Manager by clicking the [Create/Edit Shopping Cart] link on the Quick Clicks menu located on the Main Menu or by clicking the maintenance icon ![]() on the Main Menu and selecting the Cart Functions tab>Create/Edit Shopping Carts.
on the Main Menu and selecting the Cart Functions tab>Create/Edit Shopping Carts.
Click the [Add Cart] button.
Enter a value in the Store Name field. The value entered should easily identify the web site that it represents, but do not include ".com" in the name of a shopping cart.
Select [SumEffect] from the drop-down list as the Cart Type. If the user is only licensed for one shopping cart type, the Cart Type drop-down box will not be visible.
In the CartID/User Name and the Cart Password fields, enter the appropriate username and password combination that matches those entered at the web site. (Same username and password information that was entered in step 5 of the previous section).
Leave the Store Code field blank.
Enter the value that is in the Script URL field at the web site, as shown on the image in step 5 of the previous section, in the Script URL field of the shopping cart definition in Order Manager.
Click [Save] to create the shopping cart definition and leave Edit mode.
Click the [Test Script URL] button to validate the accessibility of the web site.
A message box will appear to indicate the success or failure of the test.
A successful test will show a message box stating: "Test passed: script version: [X.XX]". Click [OK].
If an error message is displayed, verify that the values in the Script URL fields match exactly, between the web site and the Order Manager.
All connections to the script take place via secure HTTP (https://). If the error message indicates a "404 Not Found" or "Page could not be displayed" error, contact the web host.
Click the [Close] button to exit out of the Shopping Carts form. See the Knowledge Base pages listed below to import data from the web site, or other related tasks.
If changes need to be made to the shopping cart definition in the future, click the [Edit Cart] button to access these settings once again.
Created: 1/12/11