There are two parts to the Storehost cart setup. First you must obtain your Store ID and Access Key from your Storehost Admin page. Once you obtain that data, enter it into the Shopping Carts screen in the Order Manager.
Log into you Storehost Admin area.
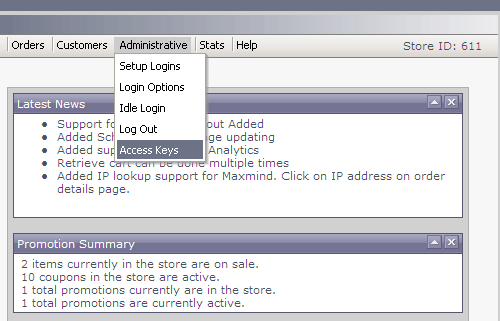
The Store ID is listed on the right side of the navigation bar.
Click the Administrative button and select Access Keys from the drop-down menu.
Once the Access Key Manager page is loaded, click Create Access Key. The Access Key will appear on the screen just above the Create Access Key button.

Leaving this web page open, minimize your browser so you can refer back to these settings at the appropriate point in the next section, when you set up the cart in the Order Manager.
You can access the Shopping Carts dialog box one of four ways:
Main Menu> Maintenance Menu> Cart Functions tab> Create/Edit Shopping Carts
Main Menu> Maintenance Menu> Setup Functions tab> Store Setup Wizard> Shopping Carts tab> Create and Edit Shopping Carts
Quick Clicks> Create/Edit Shopping Cart
Quick Clicks> Setup Wizard> Shopping Carts tab> Create and Edit Shopping Carts
The Shopping Carts dialog box opens.
Click Add Cart.
Click on the Cart Type drop down list and select StoreHost. If you are only licensed to use one shopping cart, you will not see a drop-down list; StoreHost is your default cart type.
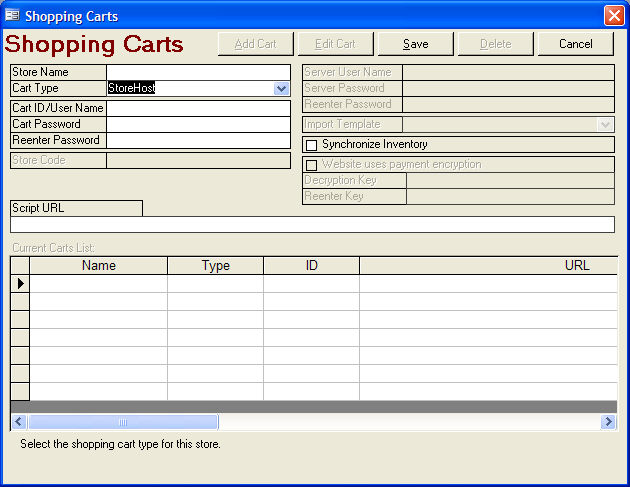
Enter the Store Name. The store name is for internal Order Manager purposes only; it can be anything you want it to be as long as it is easily distinguishable from any other stores you may have.
In the CartID/User Name field, paste the Store ID from your Storehost Admin interface.
In the Cart Password field, also paste the Store ID from your Storehost Admin interface.
Re-enter the Store ID in the Reenter Password field.
In the Script URL field, copy and paste the following link (provided by Storehost):
www1.storehost.us/stores/secure_live_data.xfm
If you plan to synchronize inventory between the Order Manager and your shopping cart, click in the Synchronize Inventory checkbox.
Note: The system parameter Synch QOH (in the Program parameter group) must be set to True to enable the Synchronize Inventory checkbox.
Click Save.
Click Close to exit the Shopping Carts dialog box.
Created 1/06/09