

In this Topic: Show
This document outlines the manual steps to create an ODBC connection to an SQL database in Windows 7.
If the ODBC connection will be made manually on a 64-bit operating system, please read the Knowledge Base article, Windows 64-bit Operating System Considerations before proceeding.
Select the Start Menu.
Select Control Panel.
Select Administrative Tools and double-click the Data Sources (ODBC) icon.
Select the System DSN tab.
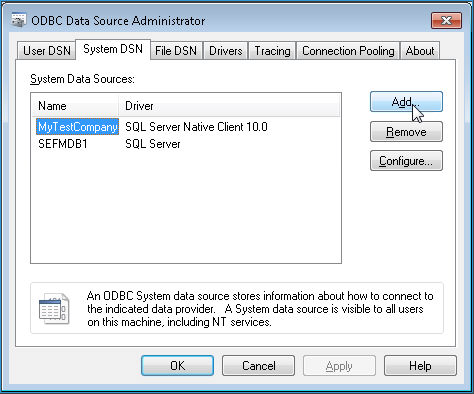
Select Add.
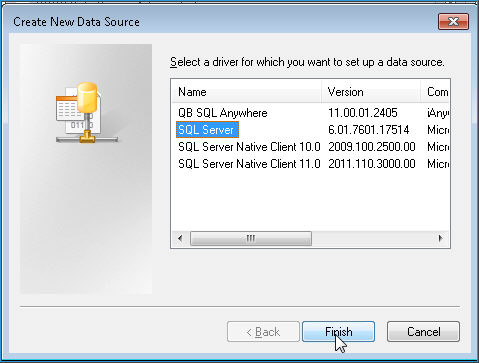
Select SQL Server from the drivers list and select the Finish button.
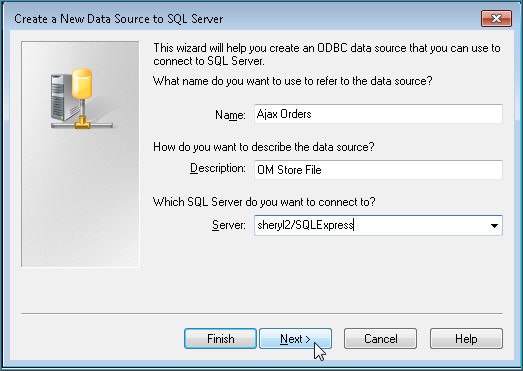
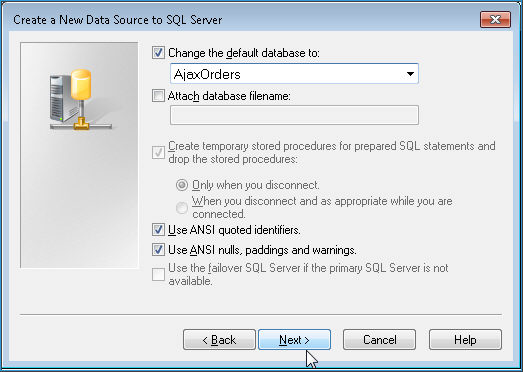
Select Next.
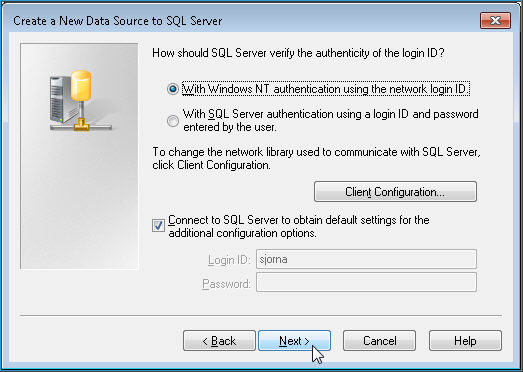
Select Next again.
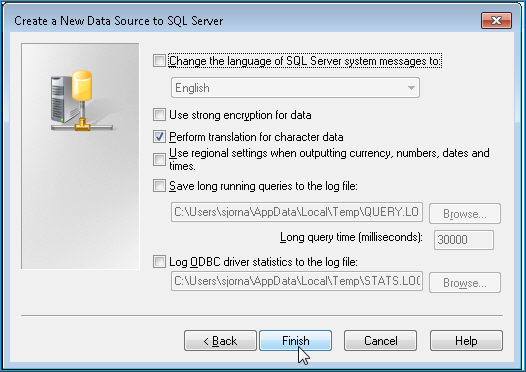
Select the Finish button.
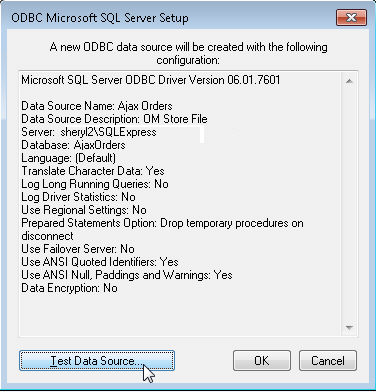
Select the Test Data Source button to verify the connection.
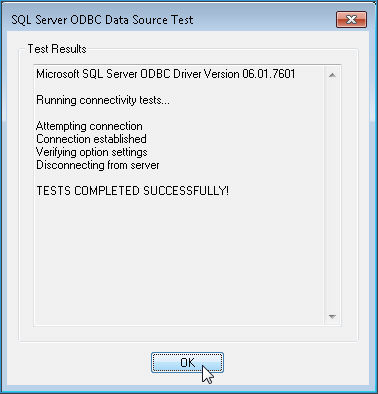
You should see the message "TESTS COMPLETED SUCCESSFULLY!".
Select OK button twice to return to the System DSN tab of the ODBC System Administrator screen.
Select OK to exit the ODBC Data Source Administrator window.
Created: 6/6/14
Updated: 11/11/14