Previous Go to End


Contents of this Topic: Show
At this time, Stone Edge is unable to capture authorizations performed by 3DCart through Authorize.Net CIM. As a temporary workaround, change the 3DCart to perform a sale rather than an authorization, or you can capture an authorization created by 3DCart at Authorize.net and manually log the payments in Stone Edge. 3DCart is working to correct this problem, but the changes are not expected to be available for more than a month from now.
Order information is imported directly from the web site
Product records are imported directly from the web site
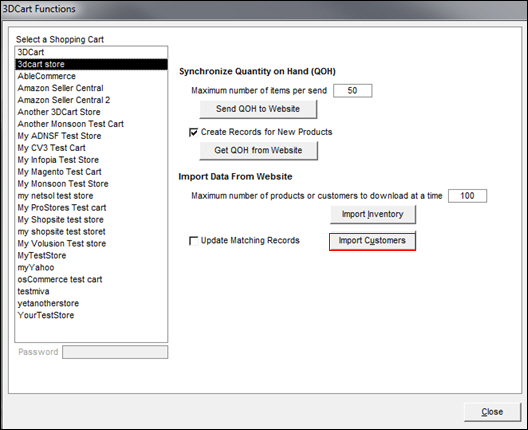
Customer record are imported directly from the web site
Custom order fields can be imported from the website
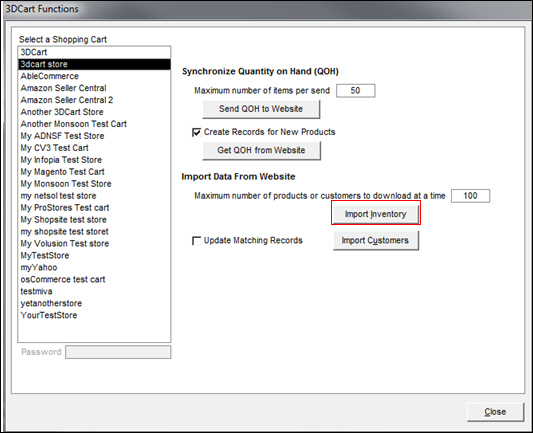
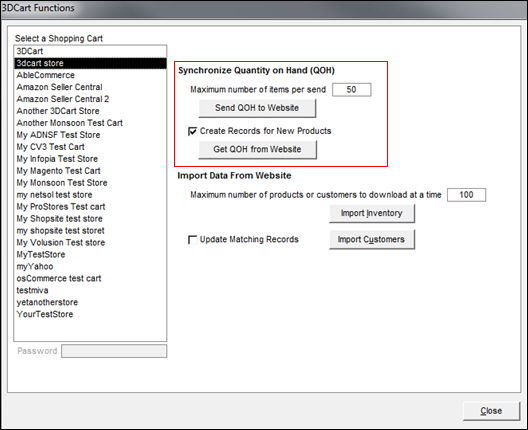
Manual Inventory Synchronization is supported in both directions (Get/Send)
Real-time Inventory Synchronization is supported at the product level
Order Status Updates are supported
Log into the 3dcart online store manager.
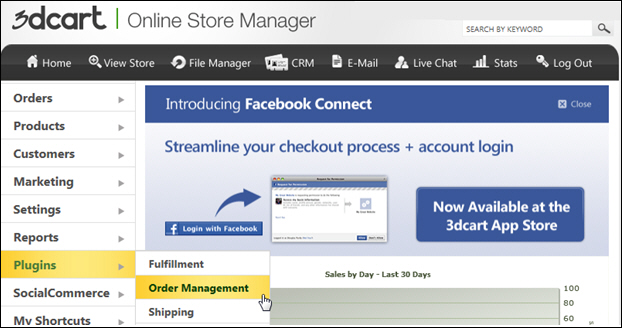
On the navigation bar to the left, select Plugins > Order Management > Monsoon Stone Edge.
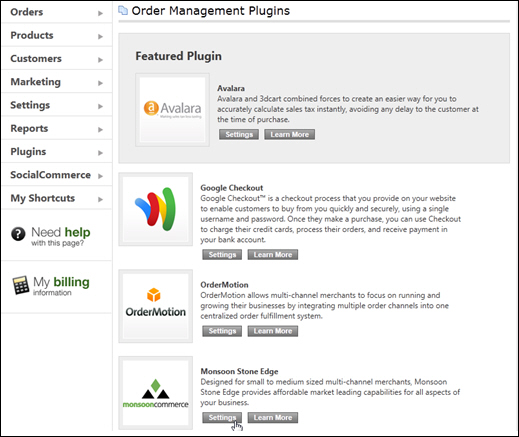
On the Order Management Plugins page, select Settings, next to the Monsoon Commerce icon.
Go to Main Menu > Settings > System Functions > Shopping Carts. The Store Setup Wizard can also be used to open the Shopping Carts screen.
Click Add New.
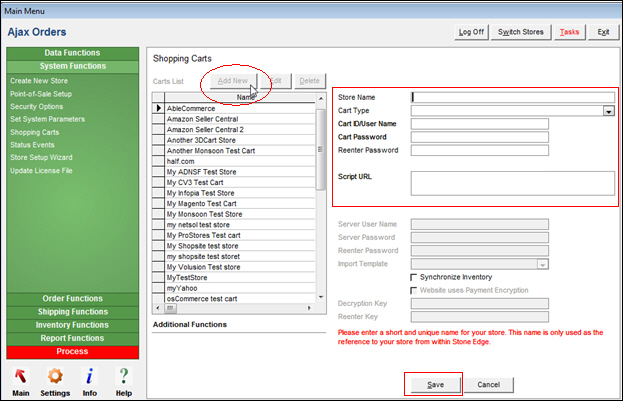
Enter an arbitrary name for the 3dcart web store in the Store Name field. It can be anything you like, but it should be unique. This value is only used internally in Stone Edge .
Select 3dcart from Cart Type. If the user is only licensed for one shopping cart system, Cart Type only displays the name of that system rather than a drop-down list of shopping cart systems.
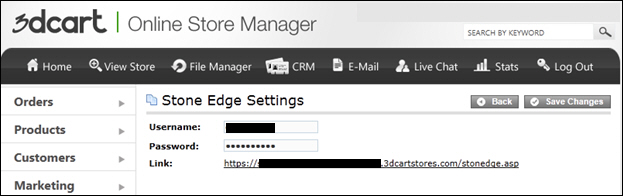
Enter the Username and Password provided by the vendor into the Cart ID/User Name and Cart Password fields, respectively. Refer to step 4 in the previous section.
Re-enter the Cart Password in the Reenter Password field.
Copy and paste the Link (URL) from the Stone Edge Settings page of your 3D Cart Online Store Manager interface into the Script URL field. Refer to step 4 in the previous section.
The URL is the secure path to your store followed by /stonedge.asp. For example, https://www.mystore.com/3dcs/stonedge.asp.
Please note the spelling of "stonedge" in this example is not a typographical error (with one "e"), it must be spelled that way.
Click Save to create the shopping cart definition.
Click Test Script URL to validate the path to the script. This button is not visible until the shopping cart definition is initially saved. If successful, the program pops a message box stating "Test passed" and the script version. This test does not validate the Username and Password credentials, merely the accessibility of the script.
3dcart supports product attributes/options.
Before importing product records from the shopping cart, decide how product attributes are handled. Details...
Customer records are also created as orders are imported if the program does not find a matching customer record in the store data file. Refer to Matching Customer Records to Existing Customers, for more information about that process.
3dcart allows you to create checkout questions in order to gather additional information from your customers as they place their orders. Go to 3dcart online store manager>Settings>General> Checkout Questions.
To import the contents of these fields as orders are imported, you must configure custom order fields in Stone Edge . Refer to the Knowledge Base topic, Configuring Custom Fields, for instructions.
Refer to Knowledge Base topics listed at the bottom of this topic for more information about the following steps.
You must select or define status labels in Stone Edge that match the status labels accepted by the shopping cart. The standard order status labels used by 3dcart are:
Cancel
Hold
New
Not Completed
Partial
Processing
Shipped
UnPaid
You may also define your own status labels (at the Edit Order Status screen of the 3dcart online store manager) using the following fields:
Custom 1
Custom 2
Custom 3
Refer to Knowledge Base topic, Inventory synchronization, for more information.
Select Edit.
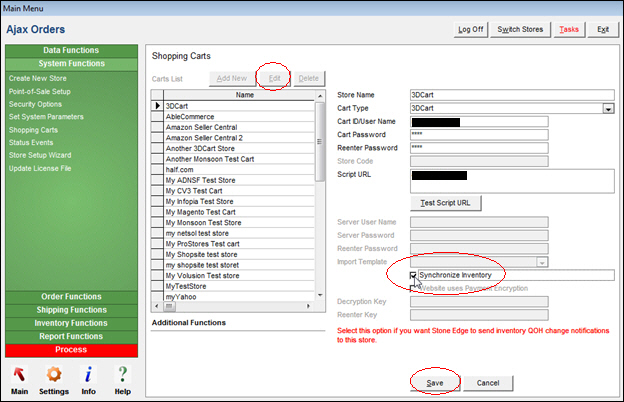
Select Save.
Shopping Cart Functions Screen
Matching New Records to Existing Customers
Created: 9/7/12
Revised: 9/11/14
Published: 09/08/2015