
Version 5.9
In this Topic Show
The Enterprise Edition of the Order Manager can use either an MS Access or SQL Server database as the application's data file, however, when the application is initially launched, an MS Access data (store) file is created by the program.
Follow the instructions in this article to convert the data file from a Microsoft Access database to an SQL Server database. The conversion process has been broken out into four sections; follow the sections in order.
If Microsoft SQL Server is already installed and configured on a computer in the networked Order Manager configuration, then skip the first three steps and go to Convert the Order Manager's Microsoft Access Data File to an SQL Database.
Below are links to download pages for Microsoft SQL Server 2008 Express Edition and Microsoft SQL Server 2005 Express Edition, one of which must be installed on at least one of the workstations that will be running the Enterprise Edition of the Order Manager with an SQL database as the application's data file. Below each link to the SQL Server software in the following section are additional links for other required minimum software requirements for each version. If the installer of SQL Server does not offer the ability to download these components at the time of installation, the user can manually obtain them by clicking the appropriate link.
To obtain this product, the user must first install the Microsoft Web Platform (WebPI), which will allow the user to select other application files that can be downloaded and installed at the same time. Click the first link below to begin the combined installation process and follow the directions in the section entitled, Installing/Configuring SQL Server. The other links are provided as a courtesy to obtain background information on each of the pre-requisite components but should not have to be used to download and install them.
SQL Server 2008 Express (either "with Tools" or "with Advanced Services" release)
The user must install each of the first three components if they are not already installed on a each workstation that will be running the Order Manager with an SQL data file. The Microsoft SQL Server Management Studio Express does not necessarily have to be installed on every PC in the configuration, but it should be installed on the server where the database will reside and on at least one administrator's workstation.
This section describes the steps necessary to install the SQL Server 2008 Express Edition via the Microsoft Web PI (Platform Installer). The installation process for SQL Server 2005 Express has different setup screens, however, all the necessary settings for SQL Server are covered in this example.
Obtain the desired version of SQL Server. In this example, SQL Server 2008 Express, is used. Click on the previous link to be taken to the download page. Use the links in the previous section of this article to obtain SQL Server 2005 and its pre-requisites and data base management software.
Click the [Install] button under the column labeled Runtime with Advanced Services or Runtime with Management Tools. In this example, Runtime with Advanced Services was used.
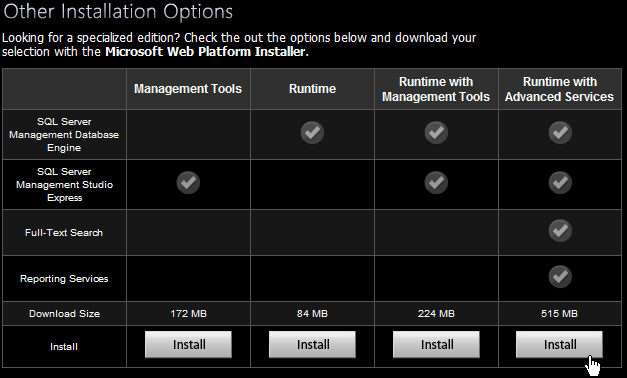
Figure 1
When the Microsoft Web Platform Installer window opens, click on the [Get the Microsoft Web Platform] button to install the application. (A Windows Administrator ID must be logged on to perform this function.)
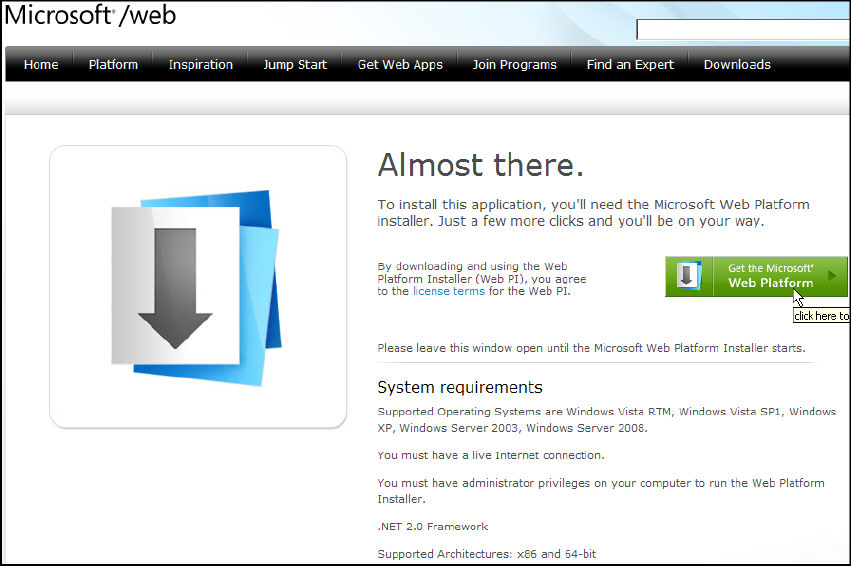
Figure 2
Choose the [Run] or [Save] option when prompted to begin downloading the Web Platform Installer (wpilauncher_n.exe).
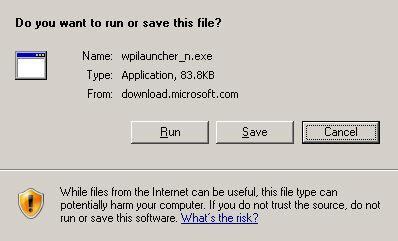
Figure 3
If Save is chosen, a popup will appear to enter a location for the installation setup file. Click [Save].
Close the Web Platform Installer window.
Navigate to the location of the installer and double-click it to begin the installation of SQL Server.
If Run is chosen the installation will automatically begin.
Figure 4
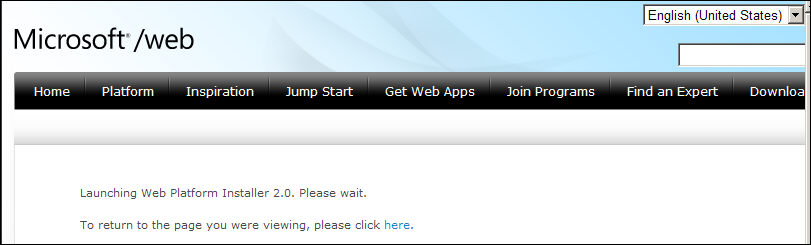
Figure 5
When the Microsoft Web Platform Installer application has been installed successfully, the following screen will appear to begin the installation of SQL Server Express 2008 with Advanced Services and the necessary pre-requisites.
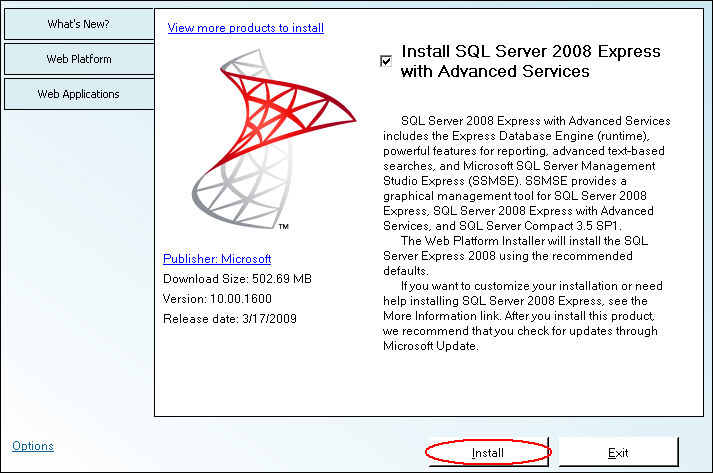
Figure 6
Click the [Install] button at the bottom of the screen (pictured above) to begin the installation. Review the license terms by clicking the [View License Terms] links on the page pictured below. When finished, click the [I Accept] button to continue downloading and installing the selected products.
Figure 7
The user will be prompted for SQL settings during the installation process. Choose which authentication mode to use and click [Continue].
Windows Integrated Authentication - use Windows NT authentication (Windows login ids) to authenticate users (RECOMMENDED BY STONE EDGE TECHNOLOGIES, INC.)
Mixed Mode Authentication - allows for both Windows NT and SQL LogonIDs to be used.
A user name and password will have to be created for the System Administrator of the SQL 2008 system that is being installed.
SQL LoginIDs will need to be created for each user and they will be prompted by the Order Manager to login to SQL Server.
Figure 8
The following screen appears to show the progress of the installation:

Figure 9
Several other screens will appear during the course of the product installations. When the installation process is complete, the following screen appears:

Figure 10
Click [Finish] to return to the Web Platform Products page and click [Exit].
Launch SQL Server Management Tools from [Start>Programs>SQL Server Management Studio].
By default, the SQL Server 2008 installer has defined a Server Name in the form, MachineName\SQLExpress, where MachineName is the first level qualifier of the Full computer name on the Computer Name tab of the System Properties screen of the workstation or server.
In the figures below, the machine name is Sheryl2 and the SQL instance name is SQLEXPRESS:
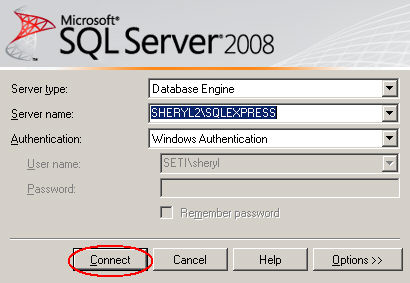
Figure 11
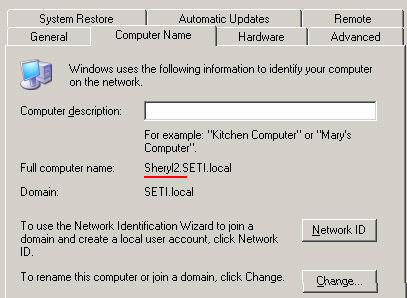
Figure 12
Click the [Connect] button, pictured above, to open the open the SQL Server Management Studio software:
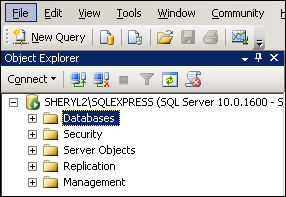
Figure 13
Right-click on the [Databases] folder and select [New Database]. The following screen appears:
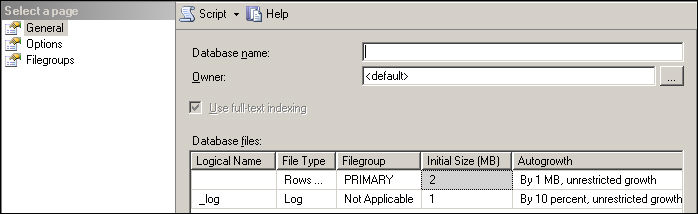
Figure 14
Enter a name for the new database on the General page. Also set the Initial Size and Autogrowth values for the database:
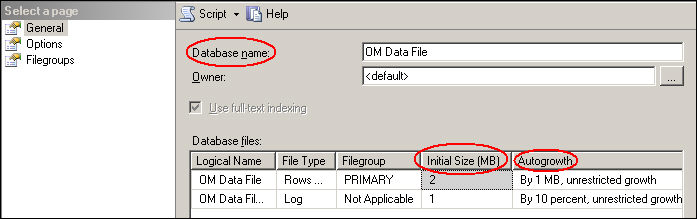
Figure 15
Initial Size
If creating a database intended for conversion, consider the size of the existing Order Manager database. Generally it is recommended the user set the initial size to that of the existing OM data file size, plus 25% (e.g. for a 1 gigabyte Access data file allocate at least 1.25gb on SQL Server). This is to account for the additional overhead SQL Server needs to store metadata like table indexes and statistics.
Autogrowth
Autogrowth is a feature that allows SQL Server to automatically expand its data and log files as more space must be allocated. Otherwise, once a database used all storage space allocated during creation, the data or log files would need to be expanded manually or an error message would be displayed to the user that the database has run out of space.
The rate of these occurrences should be kept to a minimum if possible as the autogrowth process blocks other users from accessing the database during a period of file expansion, sometimes leading to timeout errors in Order Manager.
In general, it is recommended autogrowth be enabled and set to grow by percentage. Optimal settings are difficult to determine ahead of creation. It should be noted that Order Manager is often likely to add more than one megabyte of data during typical use, so multiple autogrowths (undesirable) would regularly be required if the default autogrowth size of "one megabyte" is kept.
Select the [Options] page and set the Collation and Recovery Model parameters for the database:
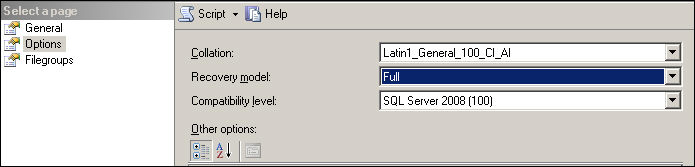
Figure 16
Collation
Suggested collation for Order Manager compatibility is Latin1_General_CI_AS (sometimes listed as Latin1-General). In the New Database form, <server default> is the default option when setting database collation and represents the collation chosen when the server was installed. When in doubt, explicitly select a compatible collation as above.
Recovery Model
A recovery model of Full is suggested if the database is under heavy use by many users, as it provides the most options for recovery in the event of database corruption. A recovery model of Simple is suggested for lower-usage databases.
Click the [OK] button at the bottom of the page to create the database. The database will appear in the Database Object List:
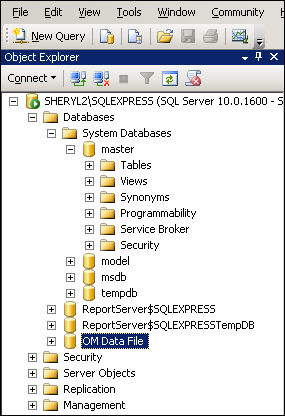
Figure 17
For the conversion to be performed, the user must be logged in as a Windows administrator account that also has SQL Server administrative access to the database. For more information, click here.
Make a final backup copy of the MS Access store file by clicking the [Backup Data File] link on the Quick Clicks or by going to Main Menu > Maintenance icon > Maintenance tab > Backup Data File.
Go to the Main Menu > Maintenance icon > Setup Functions tab. Click [Convert to SQL Server].
Note: If this selection is not visible, the Enterprise Edition of the Order Manager is not installed.
At the next screen, the ODBC connection that the Order Manager needs to communicate with SQL Server can be created, or an existing ODBC connection can be used:
Figure 18
To create the ODBC Connection, enter the name for a new ODBC data source (DSN). The name cannot contain any spaces or punctuation, other than underscores ( _ ). In this example, the new ODBC connection will be named OM_Store_File. Next, enter the name of the SQL Server instance (sheryl2\sqlexpress in this example). Finally, enter the name of the new database created in the previous section of this article (OM Data File).
To use an existing ODBC connection, click the System DSNs button on the right-hand side of the form to display the existing System DSNs. It is recommended that only System DSNs are used in conjunction with the Order Manager. Select the appropriate DSN from the list.
Click [Continue] to begin converting the store data from the Access Database to the new SQL database. The progress of the conversion can be seen in the lower left-hand corner of the screen.
Note: This process can take several hours to complete depending on the number of orders and/or products in the MS Access database. Perform this task off-hours when enough time can be allotted for its completion.
The program will prompt for permission to create the SQL files. Click the [OK] button.

Figure 19
When the conversion is completed, the following message box will appear:
Figure 20
Click the [OK] button.
The program will ask if the new SQL database store file should be opened now:

Figure 21
Click [Yes] to view the data in the new SQL database. Perform some limited testing to verify the integrity of the database before other users login and begin using the SQL store file.
When satisfied with the data, use the SQL Server Management Studio to create a backup of the new SQL database or use the Order Manager's Backup Data File utility. Create a scheduled task to perform backups of the new SQL database on a regular basis. For more information, click here.
Warning! Be aware that the original store file (Microsoft Access) is still usable after the conversion process. There are now two copies of the store file, one in Jet (Microsoft Access) and one in SQL Server format, creating the possibility of data loss if some workstations are still pointing to the old data file and any orders are processed in the interim! Going forward, all work should be performed in the new SQL database. It would be wise to remove the links to the old Access data file from each workstation's list on the Select a Store screen (Switch Stores icon on Main Menu).
Create the ODBC connections to the new SQL data file on any other workstations in the configuration and connect to the new store file. Resume processing orders.
![]()
Created: 1/28/11
Modified: 9/29/11
Go to Top