
Version 5.9
In this Topic: Show
The Standard Messages screen is accessed via the Inventory & Suppliers tab of the Maintenance Menu, and is the place where brief product messages are defined. Standard Messages are then assigned to products at the Misc. tab of the Inventory screen.
An unlimited number of product messages can be defined, but only three Standard Messages can be assigned to a single inventory item. (The program does allow the user to define one Unique Message for each inventory item via the Misc. tab of the Inventory screen.)
Once a Standard Message has been defined and assigned to an inventory item, that message (or messages) will be displayed whenever the item is added to a Point of Sale or Manual Order.
![]() Click the Show
link next to "In This Topic"
at the top of this page to see a series of links in outline form,
which can be used to quickly jump to that section of the topic.
Click the Show
link next to "In This Topic"
at the top of this page to see a series of links in outline form,
which can be used to quickly jump to that section of the topic.
In addition, major topics may provide a brief synopsis of a field's purpose or direct the reader to the appropriate section of the topic by scrolling over the image. To return to the previous location within the same page, right-click the mouse and select [Back].
If clicking a field directs the reader to a different Knowledge Base topic, it will open in a new tab or window, leaving the currently viewed topic open. The browser's settings determine whether a new tab or window is opened.
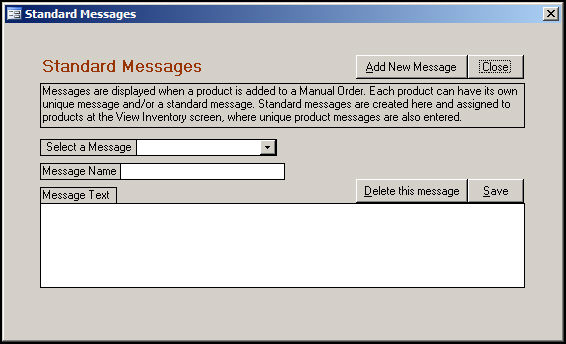
Figure 1: Standard Messages screen
click this button to remove the currently selected (viewed) message from the program
the program does not prompt for confirmation prior to deleting a Standard Message, so be sure that you have the correct message selected before clicking this button.
Go to the Inventory & Suppliers tab of the Maintenance Menu.
Select Standard Messages from the list of activities.
Click the [Add New Message] button.
Enter a name for the new message in the pop-up box shown in Figure 2:
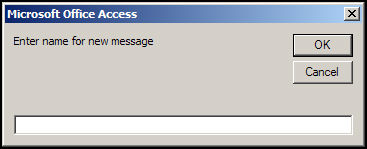
Figure 2: "Enter name for new message" prompt
Click the [OK] button.
Enter the text of the message in the Message Text field.
Click the [Save] button.
Click the [OK] button to confirm the creation of the message.
![]() The program does not prompt for confirmation prior to deleting a Standard Message, so be sure that you have the correct message selected before clicking the [Delete this message] button.
The program does not prompt for confirmation prior to deleting a Standard Message, so be sure that you have the correct message selected before clicking the [Delete this message] button.
Go to the Inventory & Suppliers tab of the Maintenance Menu.
Select Standard Messages from the list of activities.
Choose an existing Standard Message from the Select a Message drop-down list.
Click the [Delete this message] button.
Go to the Inventory & Suppliers tab of the Maintenance Menu.
Select Standard Messages from the list of activities.
Choose an existing Standard Message from the Select a Message drop-down list.
Change the name of the message or change the text of the message.
Click the [Save] button.
If the text of the message is changed, the program will request that the user acknowledge the completion of the change. Click [OK].
If the name of the message is changed, the program will prompt for confirmation before making the change. Click [OK] to proceed with the change and click [OK] again to acknowledge the completion of the change; or click [Cancel] to abandon making the change.
Go to the Main Menu > Inventory section and click [View].
Navigate to or Search for the desired inventory item record.
Click the Misc. tab.
Click the [Edit] button in the upper right-hand corner of the screen.
Select product messages from the Standard Message 1 - 3 drop-down lists as necessary.
Click the [Save] button in the upper right-hand corner of the screen.
When the item is added to an order, the Standard Message will appear in a pop-up similar to Figure 3:
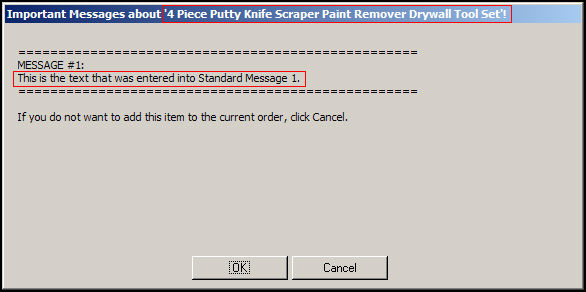
Figure 3: Example of a Standard Message pop-up when a product is added to an order
In the title bar of the figure above, "4 Piece Putty Knife Scraper Paint remover Drywall Tool Set" is the name of the product (inventory record) that has Standard Message 1 assigned to it. The text of the message is displayed under the Message #1: label.
Click [OK] to add the item to the current order.
Click [Cancel] close the pop-up. If the order is placed at the Manual Orders screen, the user will have to manually remove the line item from the order. If the order is being placed at the POS interface, the line item has not yet been added to the order when this message is displayed, so it is not necessary to remove it from the order.
Created: 7/5/11
Go to Top