
Version 5.9
In this Topic: Show
This topic offers a brief discussion about the role of User IDs and Security Groups within the Order Manager's security system, as well as examples of enabling, creating and changing security system settings. It assumes that the security system is already enabled. Refer to the Related Topics at the end of this article to find more information about the security system.
The program supplies five standard user groups: Admin, Cashiers, Packers, Power Users, and Sales People. Each of these pre-defined groups already has permission levels associated with them. The Admin group has permission to access all functions, but the permissions of the other groups can be altered to allow or restrict the use of specific forms (screens), buttons, reports, etc., via the Security System screen. To access the Security System screen, go to the Setup Functions tab of the Maintenance Menu. When the program is initially installed, only the Admin group is active when the security system is turned on. The user must enable the other groups before they can be used.
Each employee who will use the Order Manager should have a unique user account created for them. They will be given a User ID (Login ID) and password to access the program. Do not permit the sharing of User IDs.
Individual User IDs do not have permissions assigned directly to them, instead, they "inherit" the permissions of the Groups to which they belong. If a user belongs to more than one group, they will be governed by the least restrictive permission assigned to either group. If you need to assign a specific set of permissions for just one individual, create a new group, set up its permissions, and assign that one User ID to the new Group.
Select the [Groups] tab.

Figure 1: Security System screen - Groups tab
Click on the Standard Groups drop-down list at the bottom of the page to see the list of groups that are provided with the program (except for the Admin group, which is already activated when the program is installed and the security system is enabled).
Select a Group from the Standard Groups drop down list. In Figure 1, the Cashiers group is selected.
Click the [Create Group] button.
A message box stating "Done!" indicates that the standard group has been activated.
Click [OK].
The Cashiers group is now visible in the Group Name drop-down list.
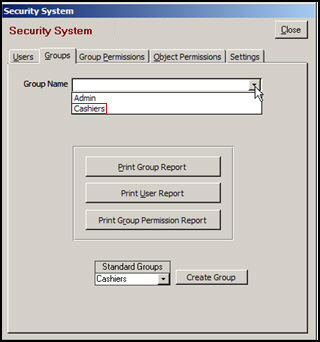
Figure 2: Security System screen - Groups tab
Click on the [Groups] tab.
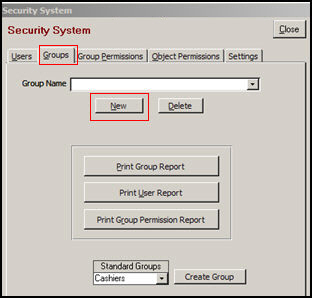
Figure 3: Security System screen - Groups tab
Click the [New] button.
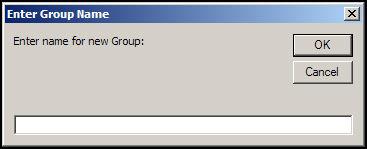
Figure 4: Enter Group Name prompt
Enter a name for the new group and click [OK].
The program will prompt the user whether to copy all permissions from another permissions group:
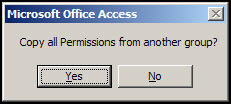
Figure 5: Copy Permissions from Group prompt
Click [Yes] or [No].
If you respond [No], the process is complete and the new group has been created. The user will have to go to the Group Permissions tab and manually set the permissions for this group. It may be best to select the pre-defined group that best matches the level of access that this new group should have and then manually alter the permissions one or two controls rather than recreating an entire group's permissions.
If you click [Yes], the program prompts the user to select the name of the group from which the permissions should be copied:
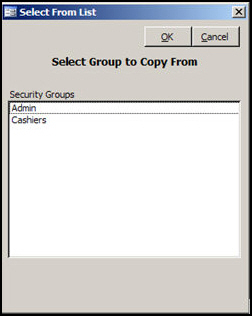
Figure 6: Copy Users from Group prompt
Select a group from the list and click [OK] to proceed. The program will prompt whether to copy all users from another group:
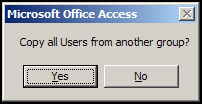
Figure 7: Copy Users from Group confirmation prompt
Click [Yes] or [No].
If [Yes] was clicked, the program will copy the User IDs of all individuals that are part of that permissions group into the new permissions group definition. The process is complete, but the program does not display a confirmation message to that effect.
If [No] was selected, the process is complete, but the program will not display a confirmation message to that effect. The user will have to go to the Users tab, select and edit each User ID that is to be part of the new group, and add them to the new group by checking the appropriate group box on the Edit User screen.
The best way to view the permissions of a particular group or user is by clicking one of the Print buttons that can be found on the Groups tab of the Security System screen. The report will be previewed and then the user can choose to send it to a printer. Refer to Figure 3.
prints a report that contains all of the User IDs that are assigned to each security group, sorted by Group name and then User ID
prints a list of all of the User IDs that are defined in the security system and shows the Groups to which they belong
prints a report of the various permissions associated with each group, sorted by group name and then by object name; shows specific permissions for each control
Open the Security System screen. Main Menu > Maintenance Icon > Setup Functions tab > [Security Options].
Click on the [Object Permissions] tab.
Select an Object Type (Form or Report).
Select the specific object from the Select Object drop-down list
The permissions for the selected object will be displayed in the list box at the bottom of the screen.
Use the vertical scroll bar to view the entire list.
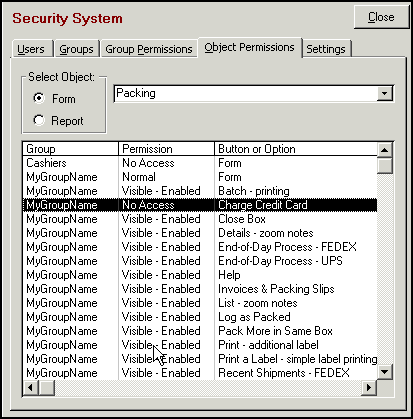
Figure 8: Security System screen - Object Permissions tab
Open the Security System screen. Main Menu > Maintenance Icon > Setup Functions tab > [Security Options].
Click on the [Group Permissions] tab.
Select a Group from the Select Group drop down list.
Select an Object Type (i.e., the screen or button whose access is being changed).

Figure 9: Security System screen - Group Permissions tab
Object types and their possible options:
Form: (Screens)
No Access (i.e., user cannot open the form)
Normal Access (the form can be opened but the user's permissions can be limited).
Form Control: (Buttons that control various functions on a given form)
No Access (button is hidden)
Visible - Disabled (button can be seen but not clicked)
Visible - Enabled (button can be seen and clicked).
Report:
No Access (user cannot print report)
Print (user can print report)
Click [Enable All Buttons] to give the selected group the ability to use all buttons on a given form.
Click [Hide All Buttons] to prevent all of the buttons on a given form from being visible to users assigned to this group. It is possible to enable one or two specific buttons afterwards, if needed.
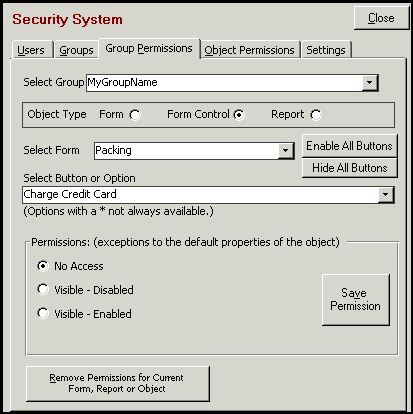
Figure 10: Security System screen - Group Permissions tab
To change a permission, select an option (i.e., No Access, Visible - Enabled, etc.) and click the [Save Permission] button. In the image above, the members of MyGroupName will not have the ability to charge credit cards on the Packing Form.
To remove all permissions for the selected object from the current group, click the [Remove Permissions for Current Form, Report or Object] button.
To copy the current group's permissions to all forms, click the [Copy Current Group and Permissions to all Forms] button (only available if the Object Type is Form).
Open the Security System screen. Main Menu > Maintenance Icon > Setup Functions tab > [Security Options].
Click on the [Users] tab.
If the Packers and Sales People lists have been populated with the names of those users via the List Maintenance function, the program can import them, by clicking the [Import Order Manager Packers & Sales People] button.
Otherwise, click the [New] button, found under the User ID drop-down list.
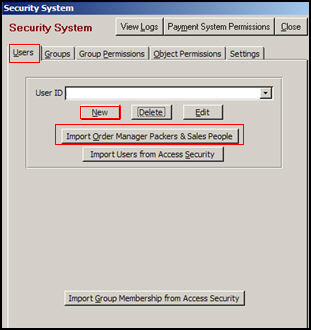
Figure 11: Security System screen - Users tab
The User Info screen will open:
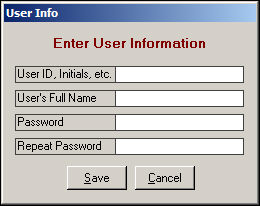
Figure 12: User Info screen
Enter an arbitrary value in the User ID field.
Enter the user's first and last names in the Full Name field. This field is only for informational purposes, the program does not use this field when validating users.
Click [Save].
Otherwise, click the [Close] button to exit the User Info screen. The newly created User ID will now appear in the User ID drop-down list on the Users tab of the Security Settings screen.
Open the Security System screen. Main Menu > Maintenance Icon > Setup Functions tab > [Security Options].
Click on the [Users] tab and select the User ID to be changed from the drop-down list:

Figure 14: Security System screen - Users tab
Click the [Edit] button to open the User Info screen:
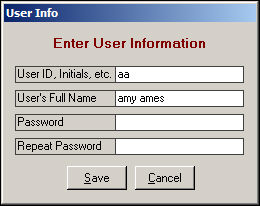
Figure 15: User Info screen
Make the necessary changes to the user's Full Name or Password fields and click [Save].
Click [Save] or [Cancel] to abandon the changes.
Open the Security System screen. Main Menu > Maintenance Icon > Setup Functions tab > [Security Options].
Click on the [Users] tab.
Select a user from the User ID drop down list.
Click the [Delete] button.
The program will prompt the user for confirmation before it deletes the selected User ID.
Click [OK] to proceed with the removal of the selected User ID or [Cancel] to abort the removal of the selected User ID.
![]()
Created: 2/2/11
Go to Top