
Version 5.9
In this Topic: Show
The Export Inventory feature of the Order Manager provides an interface by which users can export product data to a text file for use with other applications. This feature can be accessed via the Import/Export tab of the Maintenance Menu.
![]() Click the Show
link next to "In This Topic"
at the top of this page to see a series of links in outline form,
which can be used to quickly jump to that section of the topic.
Click the Show
link next to "In This Topic"
at the top of this page to see a series of links in outline form,
which can be used to quickly jump to that section of the topic.
In addition, major topics may provide a brief synopsis of a field's purpose or direct the reader to the appropriate section of the topic by scrolling over the image. To return to the previous location within the same page, right-click the mouse and select [Back].
If clicking a field directs the reader to a different Knowledge Base topic, it will open in a new tab or window, leaving the currently viewed topic open. The browser's settings determine whether a new tab or window is opened.
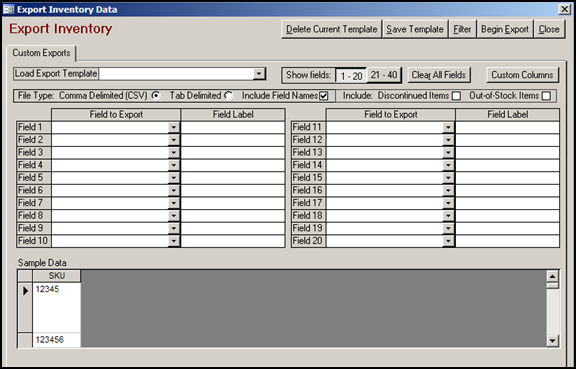
Figure 1: Export Inventory screen
click this button to remove the currently viewed template from the system; use this with caution as there is no way to reverse this action
after changes have been made to the currently viewed template, click this button to retain the changes
to abandon the changes, simply exit from this screen without clicking this button
this button will open the Select Items screen, from which the user may enter selection criteria to narrow down the list of SKUs that appear in the Sample Data section of the screen
when the appropriate selections have been made in all areas of the screen, click this button to export the specified data from the Order Manager into the text file
this button causes the program to exit the Export Inventory screen; if any changes have been made to the currently viewed template and the [Save Template] button has not yet been clicked, all changes to the template will be lost
this drop-down list contains all of the export templates that have been created in the current store data file
to create a new export template, simply make the desired field and setting choices and click the [Save Template] button; the program will prompt the user to enter a name for the new template and it will then be included in the drop-down list of Export Templates
click on this button to see Fields 1 - 20 on the Custom Exports tab
click on this button to see Fields 21 - 40 on the Custom Exports tab
to wipe all selections from fields of the currently viewed template, click this button; use this button with caution, the program will not prompt for confirmation before clearing the data
clicking this button will open a help screen with instructions for creating a non-standard column in a template
enter a label to be used for the Field Name of the custom column; if no label is entered the program will use the name of the field as its label
choose "Add Custom Column" from the Field to Export drop-down lists in any of the Fields 1-40
to produce a column that contains the same value in each row, enter a comma after the value in the Field Label column and append the static value; for example, if we select "Add Custom Column" from the drop-down list in Field1 and enter a label of Drop-ship Charge,Not Applicable, every record in the file would contain the value, "Not Applicable", in the column labeled Drop-ship Charge.
the data fields in the text file will be separated by commas
the data in the text file will be separated by a tab character (appears to be one or more blank spaces between the fields)
select this box to have the Order Manager field name or an alternate Field Label inserted in the first row of the text file
click this box to include products that are marked as discontinued in the export file
click this box to include products that are currently out of stock in the data in the export file
each of these fields relates to a an Order Manager field in the product inventory record
select the desired field from the drop-down list in the Field to Export Column
fields are exported in the sequence in which they mapped
each row in this column contains a drop-down list from which an Order Manager field can be selected for export
to use a value other than the Order Manager field name when exporting product data, enter the alternate value in the Field Label Column
check the box labeled [Include Field Names] to have the labels included in the first record of the text file
this area of the screen will reflect the product and fields that are selected for export
to limit the products in this section, use the [Filter] button to enter selection criteria
To access the Export Inventory screen, go to the Main Menu > Maintenance Menu > Import/Export tab and select [Export Inventory] from the list of activities.
Select an export template from the Load Export Template drop-down list or create a new template by selecting the appropriate fields and settings and click the [Save Template] button. The program will prompt the user to enter a name for the template, which will then appear in the drop-down list.
Select the type of text file that will be created. This decision depends on the application with which the data will be used. If you are unsure of the file types the application accepts, consult its documentation. If the application accepts both file types, follow this general guideline: If the data contains commas, apostrophes, quotes and/or carriage returns, use the tab-delimited format. If the data does not contain special characters, use the comma-delimited format.
If the first row of the file should contain the field names, click the [Include Field Names] check box.
If discontinued items should be included in the list of products that will be exported, click the [Include Discontinued Items] check box.
If products that are currently out-of-stock should be included in the export, click the [Include Out-of-Stock Items] check box.
In the Sample Data section, note that the first column is already populated with a list of SKUs from your inventory records.
To map the inventory SKU field to Field 1, click the drop-down menu in the Field to Export column of that row and select [SKU] from the list. As the other fields are mapped, their values will also appear in the Sample Data section of the screen.
To export a subset of your inventory products, click the [Filter] button to open the Select Items screen. After a list of items is built at that screen, click the [Export Selected Items] button to return to the Export Inventory screen, which now shows the filtered list of products in the Sample Data section.
Continue mapping additional fields (Field 2 - 40) as needed. Or, select [Add Custom Column] from the Field to Export drop-down list, and enter a name for the custom field in the Field Label column of that row. To create a custom column that will always contain the same static value, enter the static value following the Field Label in the format: FieldLabel,StaticValue
Click the [Save Template] button to retain these settings. The program will prompt the user to enter a name for the template or permission to overwrite an existing template with the changes. Click [OK] to proceed.
Click the [Begin Export] button. The program will prompt the user to provide a name and location where it should create the export text file.
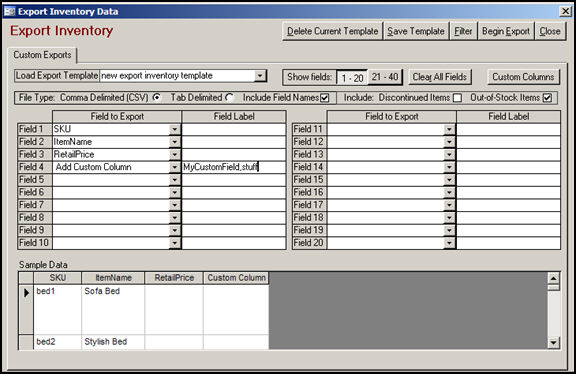
Figure 2: Example of an Export Template with a Custom Field
In Figure 2, we see that a template named "new export template" has been selected. This template only has four fields mapped, one of which is a custom column that will contain the value "stuff' in every row of the export text file. The file will be a comma-delimited text file and field names will be included in the first row of the text file. This export file will not include discontinued items, but it will include those items which are currently out of stock. A filter has been applied to select only those product inventory records in which the SKU begins with the letter 'b'.
Click the [Begin Export] button.
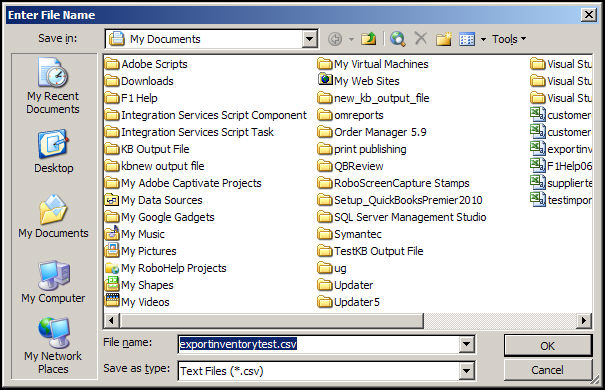
Figure 3: Enter File Name and Location prompt
Click [OK] to use the name and location suggested by the program or navigate to another location and enter the name of your choice in the File Name: field.
If the file name already exists, the program will prompt the user for the action it should take.
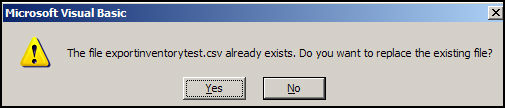
Figure 4
Click [Yes] to overwrite the file or [No] to use a different file name or location.
Click [OK] to proceed with the export. The program will pop-up a message box when it has finished.

Figure 5
Click [OK] to end the dialog. When we view the text file it looks like this:
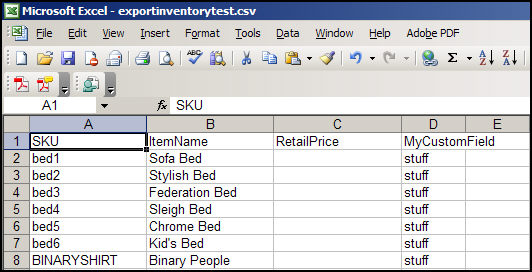
Figure 6
Notice that the first row of the file contains that field names, and that the custom field contains "stuff" in every row of that column. It also appears that someone forgot to enter price information for their products before creating this example!
Created: 3/1/11
Go to Top