
Version 5.9
In this Topic: Show
This topic refers specifically to the Cherry GB1-7000 Keyboard. Refer to the manufacturer's Web site for the latest information.
Plug in the Cherry Keyboard to your computer.
Install the Cherry Keyboard software.
Note: The setup disc included with the Cherry Keyboard may be outdated! Please download the latest software from the manufacturer's site. Be sure to choose the correct version for your keyboard (USB or PS/2):
http://www.cherry.de/files/software/Cherry_Tools_54_EN.zip
After you plug in your keyboard and install the software, there are two parts to the keyboard setup. In the first part of the setup, you configure the Cherry Keyboard software to place "header" and "terminator" characters around each track of credit card data. This will allow the Order Manager to "parse" the data into usable fields. In the second part of the setup, you "tell" the Order Manager what those track header and terminator characters are by inputting them into designated fields in the Order Manager Point-of Sale setup.
Visa and MasterCard credit cards contain two tracks of account data in the magnetic stripe; American Express credit cards contains three tracks of account data. However, you cannot configure the Order Manager for three tracks of data or you will get an error message when you run Visa and MC cards. Therefore, even if you accept American Express cards, you must only configure header and terminator characters for two tracks of data.
To open the Cherry Keyboard software, go to Windows Start menu> All Programs> Cherry Tools> Designer.
In the Designer Wizard window, select Modify active configuration of a keyboard and click Next.

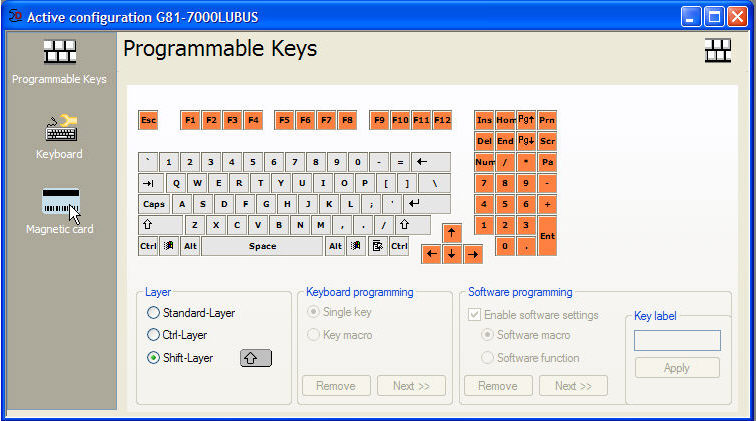
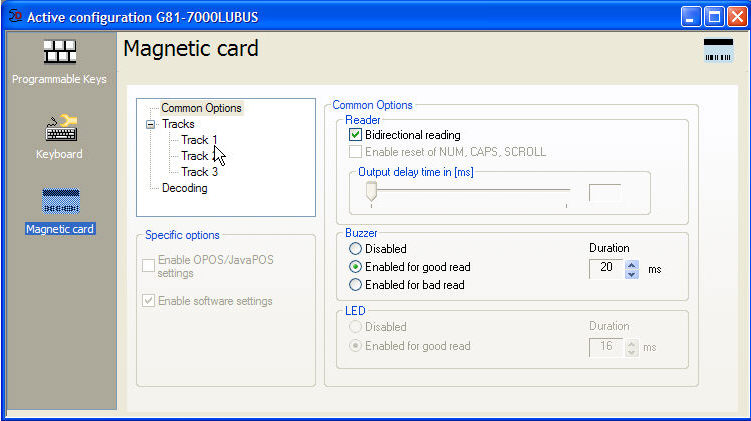
Click Magnetic Card to program Header and Terminator characters for each track of credit card data
Click on Track 1.
Check the Track 1 Enabled checkbox if it's not already checked. Configure Track 1.
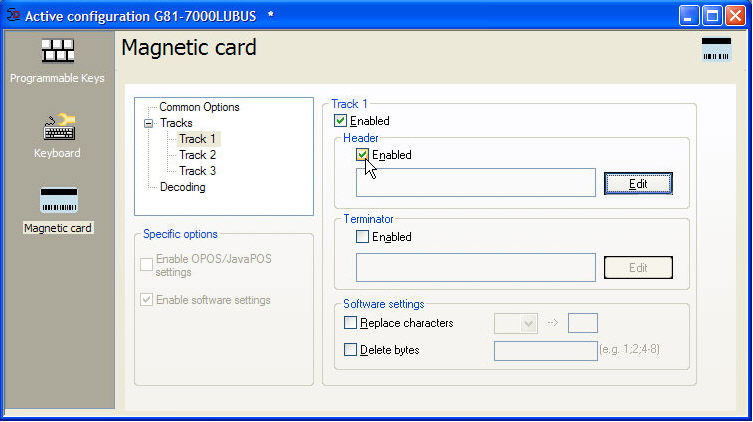
Click the Enabled checkbox under Header.
Click the Edit button. The Cherry Macro Recorder screen opens.
Un-check the Show Upcode box.
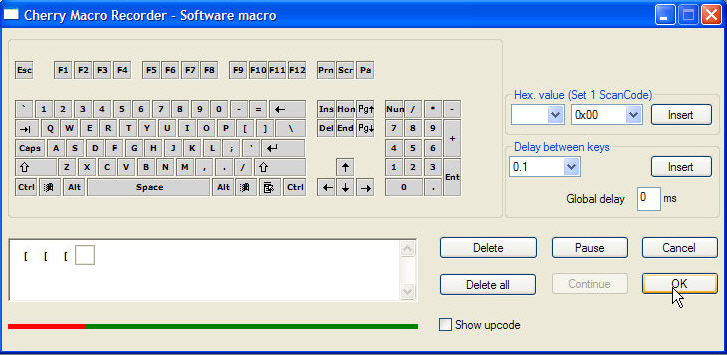
Using the keyboard screen, click the open bracket character three times ([[[) so that it appears in the lower selection window. You can use a different character if you want, but we recommend 2-3 characters that you are unlikely to type together, such as three brackets, three back-slashes (\\\), or two semi-colons (;;).
Click OK to save the characters. Three open bracket characters appear in the Header field.
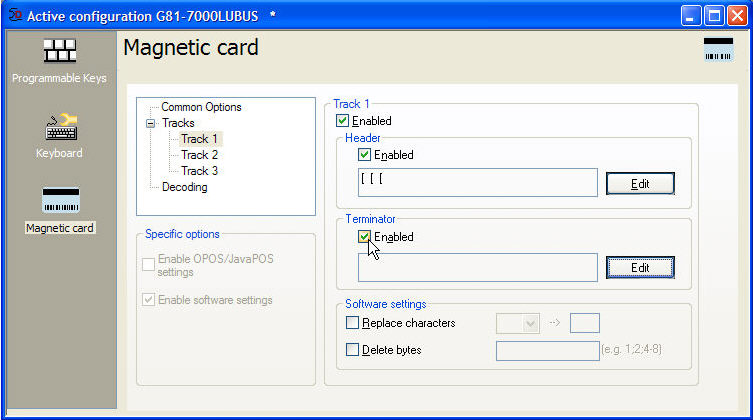
Click the Terminator Enabled check box.
Click the Edit button to open the Cherry Macro Recorder again.
Using the keyboard screen, click the back-slash character one (\) time so it appears in the lower selection window. (Do not use more than one character in the Terminator field!)
Click OK. The back-slash character appears in the Terminator field.

Repeat steps a. through h. for Track 2. Use closed brackets (]]]) for the Track 2 Header and the same character, a single back-slash (\), for the Track 2 Terminator.
When you're done, click the Activate button on the upper navigation bar of the screen. A Keyboard Testing window opens that allows you to swipe a credit card to see the placement of the Header and Terminator characters you just programmed.
Leave the Cherry Designer software open to ensure that you the type the correct characters into the Order Manager.
Go to Maintenance Menu> Setup Functions> Point of Sale Setup.
Select the Scanners tab.
Click the Edit button to configure the Prefix (Header) and Suffix (Terminator) for Track 1 and 2.
In the Track 1 Prefix field, enter the Track 1 Header characters you programmed into the Cherry software. In Track 1 Suffix field, enter the Track 1 Terminator characters that you programmed into the Cherry software. Enter your Track 2 Header and Terminator characters into the Track 2 Prefix and Suffix fields respectively.
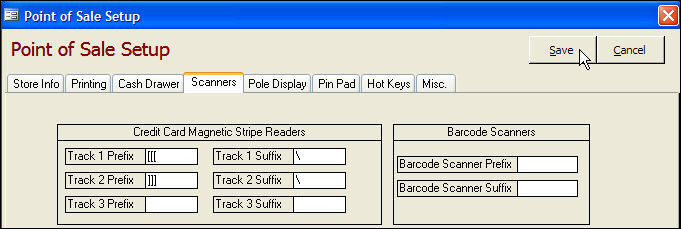
Click Save and then Close to finish.
Click File> Exit to close the Cherry Designer software.
Note: You can also specify the prefixes and suffixes at the Set System Parameters screen.
Created: 1/17/12
Go to Top